Saturday, 26 December 2020

Tonic Studios Stamp Club 4 - Shoot for the Moon (affiliate)

Stamp Club 4 is a set of stamps and coordinating dies which can be used together to create all sorts of creative mountain and moon scenes with trees and stars matching sentiments.
My affiliate links to buy - 

This set just cries out to be used with lots of Tonic's Nuvo products!

This is what you'll find in the set!


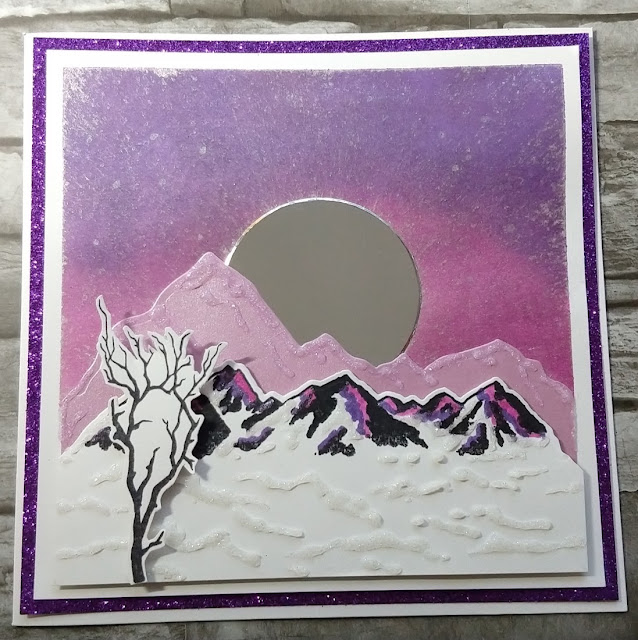
What you'll need to create the card above  - 

Stamp Club 4 dies and stamps
Craft Perfect 7x7 Bright White card blank
Craft Perfect A4 Nebula Purple Glitter Card
Craft Perfect A4 White Smooth Card
Craft Perfect A4 Chrome Silver High Gloss Card
Craft Perfect A4 Pearlised Card- Gleaming Lilac
Nuvo Hybrid Ink - Oriental Iris and Exotic Orchid
Nuvo Glacier Paste - Frosted Petal
Nuvo Glitter Accents - Fresh Snowfall
black ink


These are the steps to make the card  
1. Tape a 15.25cm square of white card to your work surface. Die cut the circle and larger mountains from white card and attach with repositionable tape as shown.


2. Use a blending brush or sponge to add purple and pink ink to the top of the card.


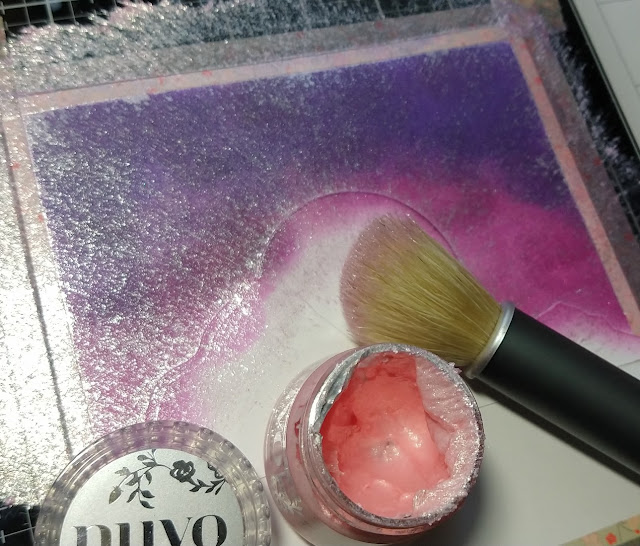
3. Use a large blending brush to apply the Glacier paste over the ink, radiating from the centre of the moon.


4. Remove the moon and mountains


5. Die cut a silver moon and attach over the moon shape left in the ink.


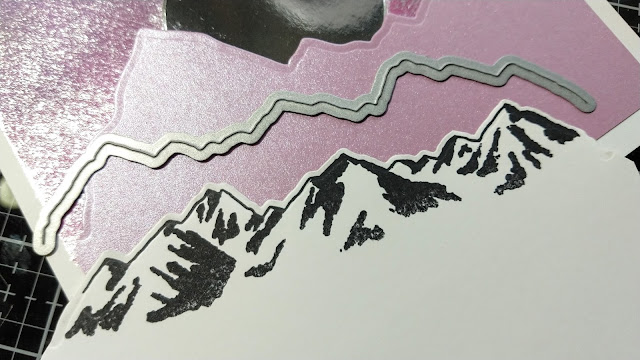
6. Die cut the large mountains from Gleaming Lilac card and attach to the card with double sided tape.


7. Stamp the mountains onto a piece of white card which is long enough to reach the bottom of your image panel, with black ink and die cut.  

                                  8. Add some detail to the mountains with the glitter markers.


9. Add Glitter Accents to the white area.


10. Attach the inked mountains to the card with 3D foam tape and add Glitter Accents to the lilac mountains.


11. Stamp the tree with black ink and fussy cut.


12. Add the tree to the bottom left with 3D foam tape.


13. Stamp the sentiment onto white card. Cut into a banner shape and ink the edges with the Oriental Iris ink. Add to the top of the card with 3D foam tape.


Tuesday, 22 December 2020

Tonic Studios Showcase 3 - Decadent Swirls (affiliate)

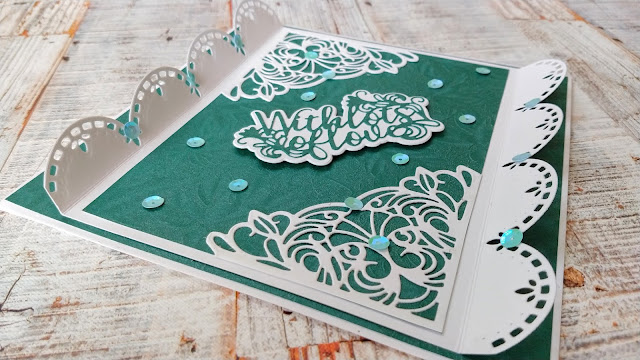
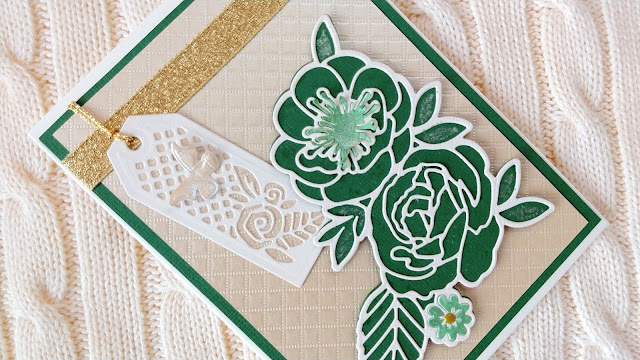
The gorgeous new Showcase 3 Dies from Tonic Studios have just been released!
UK – https://bit.ly/2KLroCX USA - https://bit.ly/37GjNyA (affiliate links) These are big dies which can be used to create fancy borders, to make frames or even decorate scrapbook pages etc. I'm sure you'll find lots of other ways to use them too :)


You can see my video here -


Thursday, 17 December 2020

Tonic Studios Designer's Choice 14 - Exquisite Censer Gift Box (affiliate)

              Today sees the release of the gorgeous Tonic Studios Designer's Choice No. 14 Die Set.

These are my affiliate links to buy the set - UK - https://bit.ly/3akvH2J

                                                                     USA - https://bit.ly/3alUmUU

 This one is called the Exquisite Censer Gift Box and, as you can see from the photos, the dies can be used to create this charming box. The finished box measures 7cm at the widest point (across the shoulders!) 5.5cm across the bottom, and 16cm from top to tail, including the handle.
In my video you can see how I also used the dies to create a slim line packet which could be used for a gift card or something flat  - or even pot pourri, as the scent will escape through the openings at the top of the packet.


I have used gold card on one and plain card on the others with the addition of some patterned paper but I can also see it looking beautiful made up in Christmas patterned paper and card!
These are only available for a limited period so if you want it, please don't wait too long or you may be disappointed.


Monday, 7 December 2020

Tonic Studios Craft Kit 39 (affiliate)


Craft Kit 39 is here!
🛒UK - https://bit.ly/37FdQAU
🛒USA - https://bit.ly/2JWmaUH (affiliate links)
I'm sure you'll love not only the gorgeous Pretty Peonies dies but all the beautiful card, stamps and Nuvo products in the kit this time :)
My video is already on YouTube and you can see it here -


Thursday, 3 December 2020

Glitter and Stencils - Tonic Studios

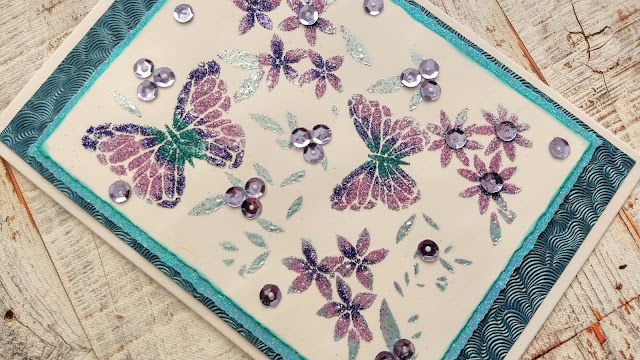
If you love all things sparkly you will love making glittery backgrounds for your cards. You really have to see this card in real life to appreciate the shine!

I have used the Butterfly Background Stencil but you could use whatever stencil you like and follow the steps.

What you will need -

 white card

 5x7 Craft Perfect Bright White card

Craft Perfect Speciality Paper (Deep Sea Dive)

Craft Perfect Tropical Tide Glitter Card

Tim Holtz Torn Edge Trimmer

Nuvo Glacier Paste (Frostbite)

Nuvo Pure Sheen Glitter - (Turquoise, Violet Infusion and Hot Pink)

Tonic Studios With Love Sentiment Strip die set

Laguna Bay Ink

Nuvo Periwinkle Blue Sequins

Tools - Craft Spoon and Media Spatula 


How to make it :

1. Cut an 11cm x 14cm rectangle of white card with the Torn Edge Trimmer. Tape the stencil to the card and secure to the work surface

2. Tape the stencil to the card and secure to the work surface.

3. Carefully remove the stencil.

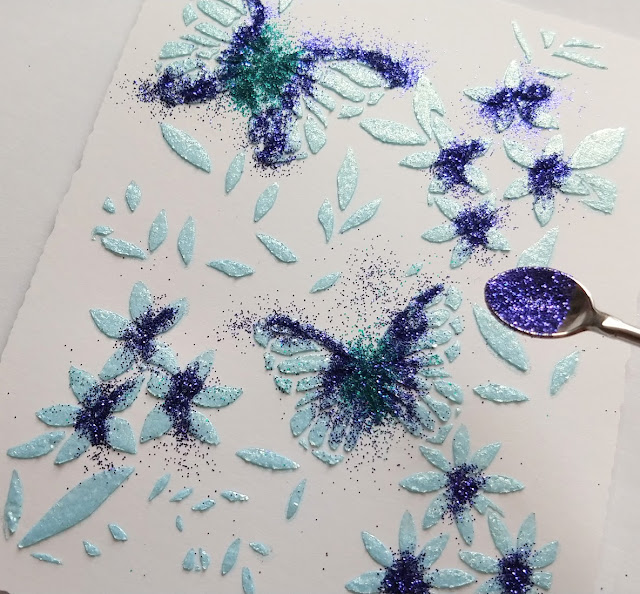
   4. Gently tap the Turquoise glitter over the centres of the butterflies, using the craft spoon. Do NOT tap off the excess.


5. Next add some Violet Infusion glitter.

6. Add some Hot Pink glitter to the butterflies and flowers. 

7. Tap off the excess glitter and dry with a heat tool. This sets the glitter to the Glacier Paste.

8. Sponge ink around the edges and add sequins to the panel. Cut an 11.5cm x 14.5cm of Tropical Tide Glitter card and glue together.

9. Glue a 12cm x 17cm rectangle of Deep Sea Dive paper to the 5x7 card and then glue the glitter panel on top.

10. Die cut the sentiment from glitter card and the back plate from white card. Glue together and glue across the centre of the card at an angle.


Wednesday, 2 December 2020

Using Glitter with a Stencil to Make a Background

 
If you love all things sparkly you will love making glittery backgrounds for your cards. You really have to see this card in real life to appreciate the shine!

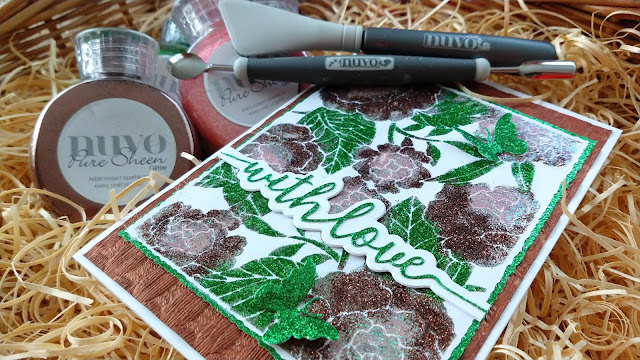
I have used the Rose Stencil from the Tonic Birthday Celebrations but you could use whatever stencil you like and follow the steps.

What you will need -

 white card

 5x7 Craft Perfect Bright White card

Craft Perfect Speciality Paper (Spice Basket)

Craft Perfect Lucky Shamrock Glitter Card

Nuvo Glacier Paste (Quicksilver)

Nuvo Pure Sheen Glitter - (Pink Diva, Copper and Green Meadow)

Tonic Studios With Love Sentiment Strip die set

Butterfly die

Tools - Craft Spoon and Media Spatula

How to make it :)

1. Tape the stencil to the card and secure to the work surface aka glass mat!

2. Apply the Glacier Paste through the stencil with the spatula.

3. Carefully remove the stencil.

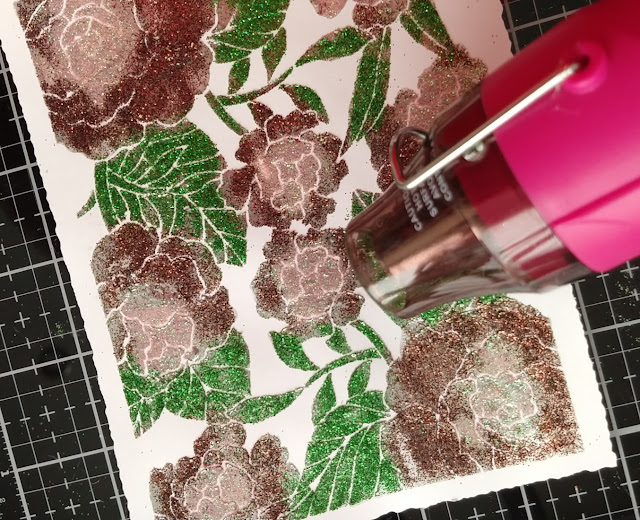
4. Use the craft spoon to apply the glitter to the Glacier paste before the paste dries.

5. Gently tap the Pink Dive glitter over the centres of the flowers. Do NOT tap off the excess.

6. Apply the green glitter over the leaves.

7. Apply the copper glitter to the outside petals of the flowers.

8. Tap off the excess and dry with a heat gun.
Trim the white card with the Deckle Edge Trimmer. Mat onto a layer of Lucky Shamrock Glitter Card.
Cut a piece of Spice Basket paper to 12cm x 17cm and glue to the card. Add the glitter panel on top.
Die cut the sentiment from green glitter card and the backing plate from white card. Glue these across the bottom of the card and finish with 2 die cut glitter butterflies.