Saturday 31 October 2015

Lough Neagh from Antrim today

 It's hard to believe it will be 1st November tomorrow - the weather was beautiful today - mild and sunny :) I've been missing "doing what I do" all week and was looking forward to the weekend so that David and I could just go somewhere quiet and peaceful for a couple of hours. I'd even been dreaming of tuna sandwiches and a flask of tea (!) so we packed up a little picnic this morning and headed down the road to Lough Neagh at Antrim. We had a really lovely day just sitting by the water and having a little walk along the river.

 Lots of crispy leaves


  One sure thing about this time of the year - the days are getting shorter - the sun is setting before you know it!


Friday 30 October 2015

A couple of images coloured with shades from the blog prize

 I just stopped what I was doing to colour a couple of images to let you see the colours in the BLOG PRIZE...
They are two drawings (apple blossom and a parrot) which I drew quite a while ago and printed off on my inkjet printer to colour with the Promarkers. The 12 colours can be used for lots of different types of images.


Blog prize - Letraset Promarkers


Time for another blog prize! The lovely folk from Letraset have sent me this as a prize to offer to followers of my blog. You must be a blog follower (existing or new)  to qualify. If you are not already a follower, you can add yourself if you like. The reason is that I will be posting more tutorials with various products on the blog and I don't want you to miss anything.

The prize is a Letraset Promarker Student Designer Gift Set!
This includes 12 Promarkers, Storage tin, A4 Bleed proof marker pad, Blender pen, Black fine liner and How To instructions.
I love these pens and I'm sure you will too!

I'll colour an image with these colours (from my own set!) and post it here when I get a chance so you can  see what these colours are like.

All you have to do is:
a) follow the blog
b) leave a comment on this post

Because I have so much going on at the moment I'm going to let this run until the end of November so I'll pick a random winner at the end of November.

Feel free to share the post.

Enjoy!

Wednesday 28 October 2015

How to use the Tonic Studios Double Detail Die and Stencil Sets


This is a step by step photo tutorial showing how to use the new Tonic Studios Double Detail Die and Stencil Sets.
There are 4 different patterns - Aztec Allium, Decorative Daffodil, Bluebell Meadow and Exotic Lily - and each comes with a die and coordinating stencil.


How to use the sets:
1. Position the die on your card and secure with masking tape.

2. This is the sandwich which you use for cutting the die in the Tonic Studios Tangerine die cutting machine. From bottom to top - Orange Die Cutting Plate, card of choice ( for best results use 240gsm), Die (cutting edge facing down into the card) and White Top Plate.

 3. This is how it will look from the side when the plates are stacked directly on top of each other ready to go into the die cutting machine.

4. Pass the sandwich through the die cutting machine and then remove the die from the card. It will have cut the intricate pattern.

 5. This is the sandwich you will need to use to emboss the pattern onto the diecut. From bottom to top - Green Die Embossing Plate, Green Embossing Mat, card, die ( cutting edge facing down into the card) and White Top Plate.

6. This is how it will look from the side when the plates are stacked directly on top of each other ready to go into the die cutting machine.

7. Pass the sandwich through the die cutting machine and then remove the die from the card. It will have embossed the detail onto the intricate pattern.

8. Using the embossed pattern as a guide, attach the stencil on top of the die cut. You will be able to see the raised areas showing through the stencil. Make sure you attach this stencil securely on top as you do not want it to move at all in the next stage. I have used masking tape but you could also use Stick and Spray etc.

There are several different ways you can finish decorating the stencil eg colour with inks through the apertures, heat emboss, colour with alcohol markers or apply mousse etc.


 8. To use the Tonic Studios Nuvo Embellishment Mousse, take a small amount of mousse from the pot on a small spatula.

9. Spread thinly over the stencil making sure that all the open areas are covered but also that the mousse does not get over the edge of the stencil on to the card.

10. Remove the stencil carefully to reveal the results and leave for a short time to dry.


You can also draw through the stencil with a fine nibbed pen and colour the stencilled areas with  the Tonic Studios Nuvo markers to create this effect.


Monday 26 October 2015

Christmas issue of Cardmaking and Papercraft magazine (150)

The postman has just been - now I have the perfect excuse to get the kettle on and do a bit of reading! My commission for the latest issue (Christmas 150) ofCardmaking & Papercraft Magazine has some die cut Christmas cards....and you know by now that I can't show you the whole page - you need to buy the magazine!! I can already see lots of lovely makes by several of my crafty friends so I'm looking forward to having a "good old read"

Friday 23 October 2015

Luxury bedding!


I think we've found a solution! This poor wee cat is so nervous of closed spaces that she seems to be sleeping under a neighbours decking at night. She is around our house all day but goes over there at night. I tried the "cat and box" trick to give her some shelter and it seems to have worked. The box is under a wooden bench which is under an arbour with a roof at the bottom of our garden. She has been sleeping there for a few hours now.

Thursday 22 October 2015

Some cards I designed for this week's classes at Paperworks, Dungannon

 I was really happy to be asked to design some Christmas cards with the lovely Dovecraft and Trimcraft Christmas collections for workshops at Paperworks in Dungannon. The classes took place yesterday and today and it was lovely to be sent photos of the ladies with their cards afterwards - thank you so much Heather! And thanks too, to all the ladies who sent their good wishes :)
Paperworks will be having a Open Craft Day on Saturday 31st October with special offers in the shop.

On the card above I used Dovecraft Glad Tidings papers, Dovecraft Christmas Basics Poinsettia dies, twine and lots of Dovecraft Crystal Glitter Glue.


 On this card I used Dovecraft North Pole papers and added Dovecraft Christmas Basics Wooden Snowflakes with ink around the edges.


On this one I used Trimcraft First Edition Jingle all the Way papers (I love the texture!), Dovecraft gold Mirror card, Dovecraft Christmas Basics Wooden frames, Poinsettia dies and twine.

Thanks again :)

Wednesday 21 October 2015

Thanks so much


If you've ever been a "regular" in the building behind this figure of Florence Nightingale in Belfast you'll know how amazing the people who work there are. I can't thank them all enough for looking after me so well over the last few weeks. There are so many people treated here every day but each one is made to feel special. Thanks so much xx

Tuesday 20 October 2015

Thank You - Dovecraft Serendipity

 Another "Thank You" card - I am feeling very thankful at the moment and have so many people that I am grateful to. A card simply isn't enough but I wanted to make one anyhow.
This time I've used the Serendipity collection by Dovecraft...you can see the papers (6x6 and 8x8),buttons, doilies, paper blossoms, wooden frames, gems, twine (from the bunting) and the "Thank You" itself is one of the new "Traditional Sentiment" dies which will soon be released by Trimcraft.


Saturday 17 October 2015

Fish Supper!

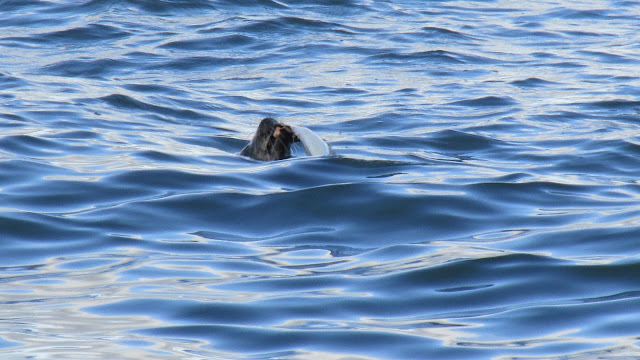
Just having a few quiet moments watching the waves (as you do ) on the edge of Belfast Lough today when up popped a seal. He was having great fun with a fish!

He put me in the notion for fish and chips :)


This sea gull tried to get the fish away from the seal so he dived under the waves

Belfast Lough at Hollywood 

The view across to Whiteabbey and Carrickfergus