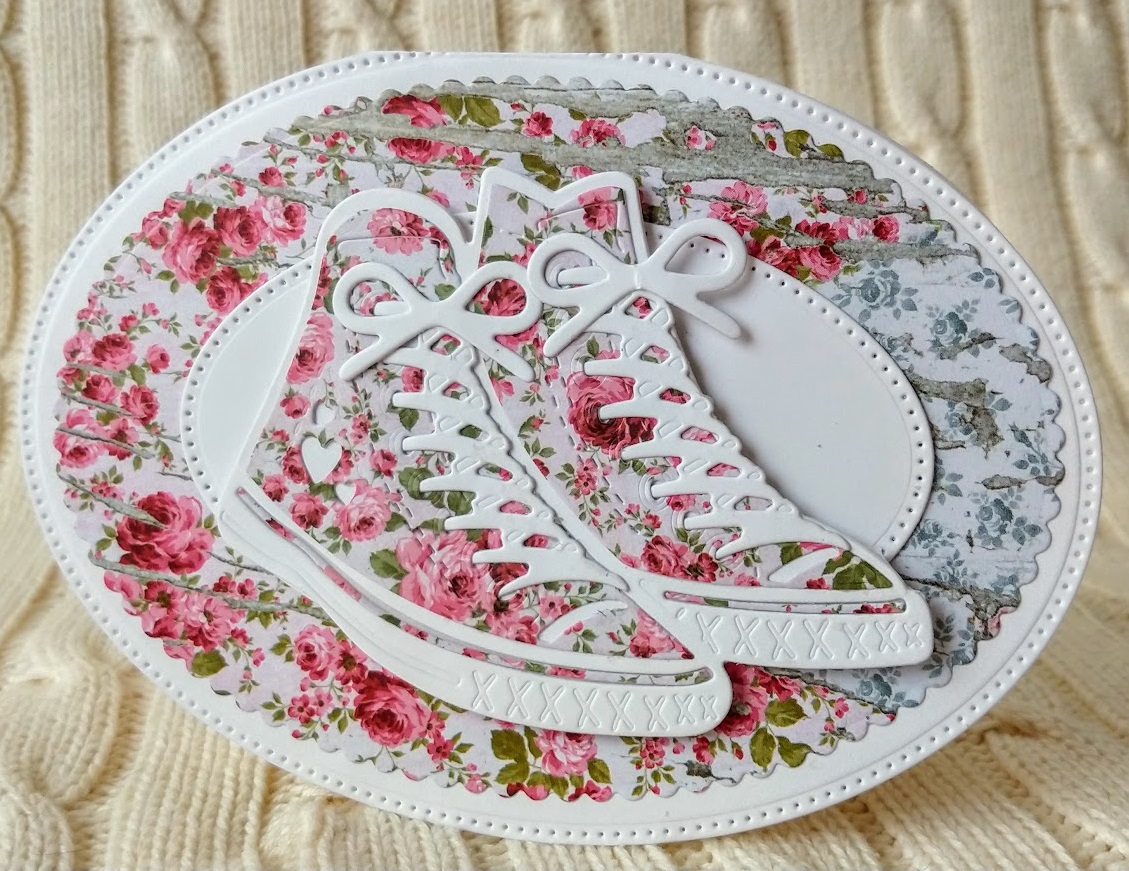
I've been playing with 2 new die sets from Tonic Studios - The Simply Shoe Shop set and the fancy Footwear Frames die set. You can use both of these separately or together. The choice is yours :)
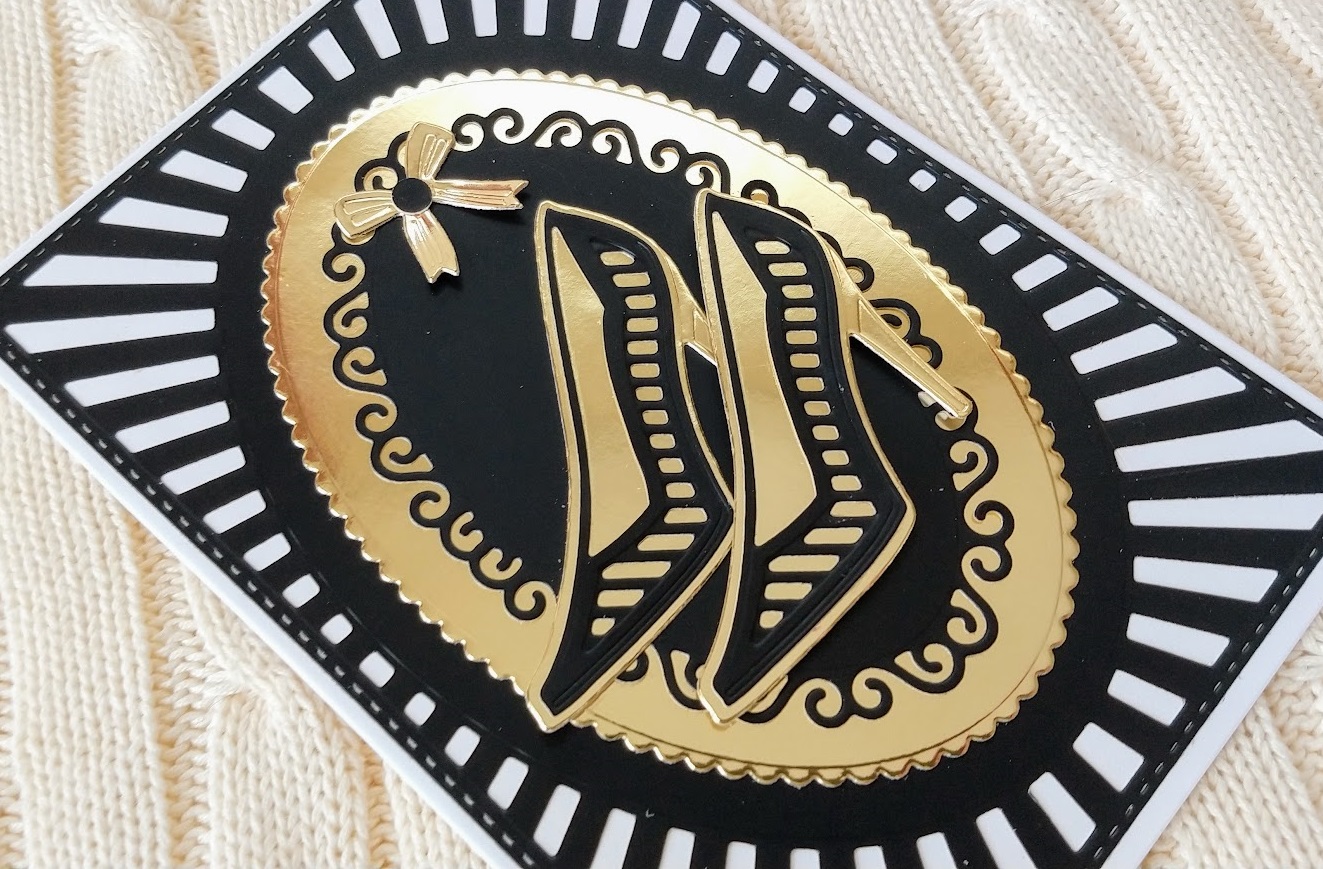
No two ways about it. I loved these 2 die sets! I started off with the intention of making 2-3 cards and talking a little bit about the other dies but enjoyed myself so much, not only did I make 5 cards, but I also made my own patterned paper for a pair of shoes! I hope this fires your imagination as it did mine :)
You can see how much I enjoyed them in my video here
I even made my own patterned paper for the leopard print high heels.
Today, I'm sharing the new Coral Skies Trend from Tonic with you :)
If you're new to "trends" let me give you a brief outline. Several times a year, Tonic release a full set of coordinating papers, card, Nuvo and Craft Perfect products. This is called a "trend". You can use the items in a trend together with any die sets etc. (There are no die sets/stamps in a trend)
You can see my video here
At the beginning of this video I show you through the items in the trend and then I go on to show you how to make 2 different cards with some of it.
The colours in the Coral Skies trend are very classy and elegant including beautiful Italian Rose High Gloss Mirror Card, Moonstone Pink Satin Ribbon and Rose Starburst Confetti etc. I'm sure you'll love it!
Cheese...cake...or cheesecake? You can have them all! The Piece of Cake die set along with the Celebration Cake set (photos coming soon!) is now available directly from the Tonic websites. If you'd like to use my affiliate links, here they are :)
If you have a closer look at these photos you'll see that there are lots of lush Nuvo products in this kit which you can use for gorgeous beachy themed projects
....and maybe a little sneak peak of something else coming soon - the new Coral Skies from Tonic which is coming soon :)
In this video, I show you the Banquet Gift Box die set from tonic Studios. This 27 piece die set actually makes up 2 boxes, an inner box and an outer one but, of course, you can use these separately. There are also some dies which can be used for card making :)
The beautiful Superb
Slider Showcase die set has 43 different dies which can be used in several combinations
to make pockets, shelves and drawers which fit together and are enclosed in a
removable cylinder.
You can use some of the
dies to decorate the front of the box or you can use patterned paper to give it
a different look. I have used some patterned paper which was in
my stash.
The little inner cylinder
has a handle which fits up through a slit in the outer covering.
In this
step by step tutorial I’m going to show you how to die cut and assemble a
Superb Slider box with one pocket and 3 drawers.
You can also see in my video here
how you can make 2 other variations, one with 2 pockets and the other with a pocket, 2 drawers and a shelf.
To make the
slider box in this blog post you will need the following Tonic Studios products
Craft
Perfect Satin Effect Mirror Card - Baroque Rose
Nuvo
Deluxe Adhesive
Patterned
paper of your choice
How to Make it
1. Die
cut the above pieces in the quantities shown, using the 300gsm card for all the
pieces except the top left, which you will cut from Classic card. You may wish
to cut extra large circles to strengthen the base.
2. Join the ling strips with the
glue tabs to form a circle and fold in the tabs.
3. Glue one large circle
into the ring and then add another on top.
4. This will form the
base.
5. Use the “slit “
die along with the medium circle die (lining up the notches) .
6. Give the large die
cuts a little curve with your bone folder and glue together to form a cylinder.
7. Glue one of the
slit circles into the bottom of the cylinder and glue the other on top of the
glue tabs, lining up the slits.
8. Cut a 27cm x 12cm
strip of patterned paper and glue around the cylinder. Cut a 1cm strip of
matching paper and glue around the base.
9. Die cut both
shapes shown from Classic card (cutting
2 of the hinges)
10. Glue the hinges
to the pocket and then attach to the back of the central card. Glue the 2
handles together and attach to the top.
11. Glue the other
central card to the back. (You can leave this and attach the drawers to the
second card before gluing them both together, as I have done in my video)
12. Die cut the same
shape from patterned paper, removing a sliver from each side and the glue tabs from
the bottom. Glue to the pocket.
13. Make the drawer
compartment. (Repeat for each drawer)
Die cut 2 of the
compartment shapes from Classic card and 2 little rectangles for the sides.
14.
Fold and burnish as shown.
15. Glue the bases
together as in the photo.
16.
Die cut 2 semi circles from 300gsm card.
Glue on to the top of the compartment. Curve the tabs around the sides and glue
onto the semi circle.
17. Repeat for the bottom.
18. Glue on the patterned
paper side panels.
19. Make 3 compartments
and glue together as a stack.
Add another semi
circle on top and add a decorative panel.
20. Glue the stack of
compartments to the central panel.
21. Make the drawer (Repeat
for the 3 drawers)
Die cut the shapes
shown from Classic card and a decorative panel from patterned paper. Glue
together in this configuration.
22.
Add decorative panels to the sides and inside.
23. Use the 2 dies
shown to make a decorative panel for the outer cylinder. Glue in place.
24. Die cut a medium
circle from 300gsm card and glue to the base. Then glue the cylinder to the
base platform.
Because I have used
paper with a bird on it, I used some Craft Perfect Jute twine to create a
little nest and added some pearls into it.
I also made a little tag to match.