Monday, 28 May 2012

Victorian Border Punch


Good morning!We've been having fantastic weather here in Northern Ireland for most of the last week - real exam weather!!
On Saturday I learnt a lesson I really should have learnt years ago....never wear a necklace while sunbathing!!
We went to the beach at Portrush on the North coast with about 80 others (lots of kids) on a Sunday School trip.I never usually lie in the sun , in fact I never usually sit still for very long, but, as we say in these parts, the "craic" was good and I just lay down and enjoyed the chat while the kids played on the sand. A few hours later I got up with burnt neck and shoulders and a lovely white "necklace"!! And, oh yes....I did plaster on the suncream.

I was having a little play with the new Victorian Border punch  by Tonic Studios a couple of weeks ago and came up with some different things to do with it. This is the first one and I've made a card and little matching bag to show it off. The image is "Two Roses" - one of my digi images from A Passion for Stamps
I've chosen bold black stripes with contrasting Antique pink. The little flowers on the strip were made using Tonic Studios Petal Pairs and Petal Pairs Petites


Here's how I made the little strip.
(THIS WORKS WITH SOME OF THE OTHER PUNCHES IN THE RANGE TOO.THE STRIP WIDTH NEEDS TO BE SLIGHTLY DIFFERENT - I'LL BE SHOWING SOME MORE IN A DAY OR TWO)
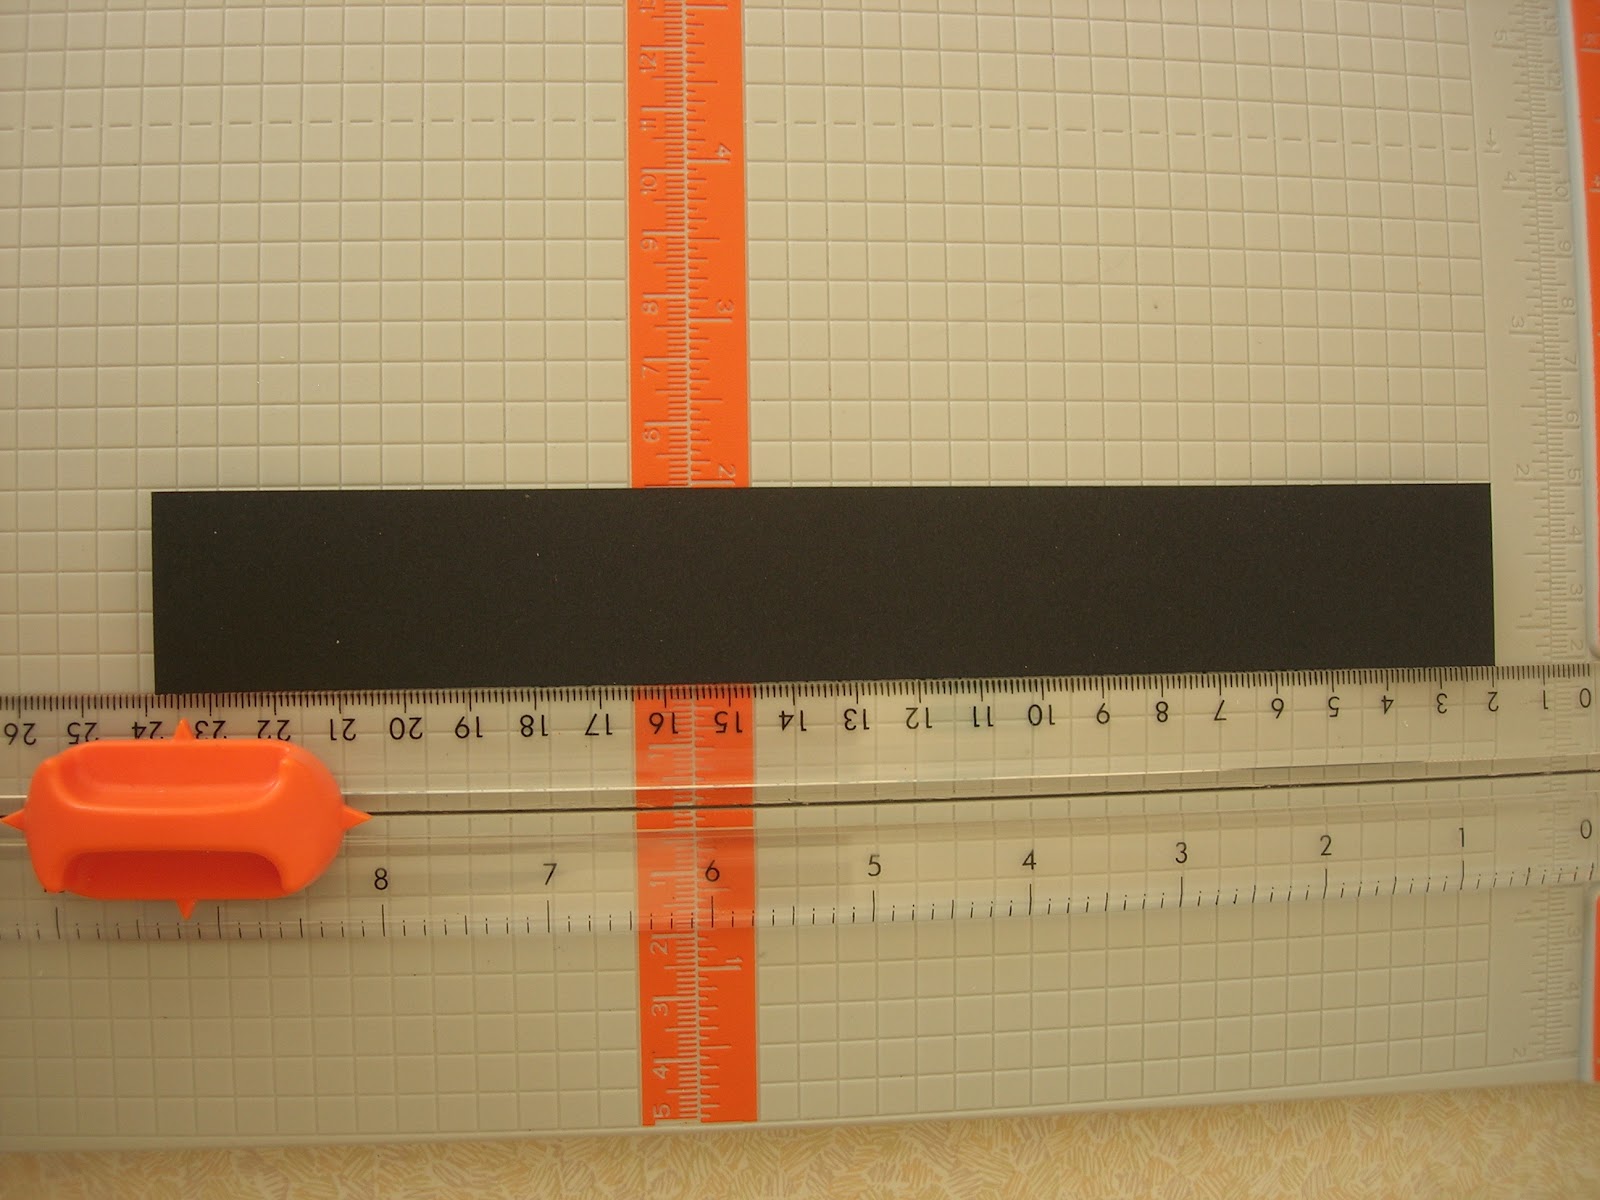

1. Cut a strip of black card 3cm wide and as long as you need for your card.


2. Punch along one side with the Tonic Studios Victorian Border punch


3. Turn the strip over and line up as shown above. I've made a little mark directly above the dashed line on the punch so you can see it above the card.


4. Now line the punch up as normal and carry on punching along the card to the end.


5. The finished strip.


Challenges
Alphabet Challenge...H = hand made flowers

Sunday, 20 May 2012

Bluebells


I've made an awful lot of cards lately which I haven't been able to blog for one reason or another so I thought it was time I made a card "just because"...

My back garden is full of Bluebells at the moment and I decided that's what I'd use for this card. I just love the way they grow in drifts and multiply each year. We had a gorgeous little rabbit for years (he died a couple of years ago) and he slept in the summer house at night but had the full scope of the garden during  the day ...so you can imagine how many plants disappeared. He loved to chew off the juicy new shoots of lots of my favourite plants and I lost lots of them that way. Now when I see them springing up undisturbed I actually miss him...!

Back to the card - the Bluebells are a digi image from A Passion for Stamps and, as usual, I've coloured them with Promarkers. I'm still showcasing the gorgeous new border punches from Tonic Studios and this time I've used Doily Border. I added a little strip of white behind it to emphasize it.

The little flowers at the corners were made with Pansies Accent punch  and the Accent Corner Wings, and I've added a little mini Butterfly at the top.

Saturday, 12 May 2012

Hyacinth


Good morning! What weather!! After a week of fairly constant rain, the sun is shining so I was able to get a photo of my card. On Monday our son ran 7 miles of the Belfast Marathon in the freezing cold and heavy rain and we got cold and wet just watching - that will teach me to leave the house in a hurry without a coat!

I thought a pretty floral card was the best thing to brighten things up...so here it is.
The image is Hyacinth from A Passion for Stamps and is coloured with Promarkers. I wanted to show off my new Tonic Studios Floral Border 2 punch so I kept the punched border white for effect.This one is a real dream to use as it lines up in a second and punches with no effort at all!

The papers are First Edition Sweet Owl and Papermania Capsule Collection...gorgeous!!

Sunday, 6 May 2012

Medals and Monarchs


Good morning. Thanks to ALL who took part in the Sir Stampalot birthday challenge and blog hop during April. I can tell you it took some time to look at all the cards and comment on as many as I could - but it took even longer to pick the winner. Congratulations to everyone who won something !

This month's Challenge theme at Sir Stampalot is Medals and Monarchs
and this is the prize....

My card is quite unusual for me as it doesn't have a stamped or digi image but I quite liked this combination of pieces and didn't think I should add anything else.
The paper is Portobello Road  and I hand cut some bunting.
The beautiful scalloped border on the red checked paper was made with the NEW Tonic Studios 
Scalloped Arc Border punch - one of the new additions to the fantastic Simplicity Geared border punch range.

Thursday, 3 May 2012

Sir Stampalot winners

Good evening. The winners of the Birthday Bash at Sir Stampalot have been announced on the challenge blog. Well done to you all!!


The winner of the prize on my blog is Alison! Congratulations!
Hope you enjoy your prize! Just send Brenda an email (her address is on the Challenge Blog, here, and she'll post it off to you.

See you soon,
Ruth :)

Saturday, 28 April 2012

Allsorts Guest DT Shaker Card


As you may have guessed from the title, this is my Guest DT card for this week's Allsorts Challenge which I'm sponsoring with 4 digi images from A Passion for Stamps.
The image I've used is Mannequin and I've added lace, a bow and some gems. You can see another of the new (soon to be released) Tonic Studios border punches used down the side of the image.This one is called Scalloped Diamond Border. There are so many possibilities for this punch - I'll be showing you them as soon as I get a chance - you'll definitely "need" this one to perk up your stitching themed cards among others!
There is a little video on Blog Tonic showing the 9 new punches so don't forget to have a look..
For the "shaker" part of my card I thought it would be a little different to use buttons to tie in with the Mannequin and faux stitching.
The two little butterflies at the top right are from my Tonic Studios Butterfly punch

I'm off to a family wedding today, so I hope the weather stays fine - have a lovely weekend whatever you have planned, Ruth :)

Wednesday, 25 April 2012

Another preview


If you haven't already seen the latest giveaway of a Glass Cutting Mat on Blog Tonic check it out HERE
Also, check out Blog Tonic HERE to find out about a £5.00 voucher!!


I managed to get to the Craft Fair in the King's Hall in Belfast for a couple of hours last Friday to meet up with Jodie who was over demoing Tonic products for 1Craft1. It's not a great photo but it's the best of the bunch as the others were too close up....


I have another little preview of one of  Tonic Studios  new punches to show you today. This one is called Daisy Border 2 and I love how deep it is. I've matted the lilac paper with white to show it off to the max before layering it onto DCWV Black and White Stack paper.
The image is Acidanthera from A Passion for Stamps and I've placed it on embossed white cardstock . The corners are the negative from the   Tonic Studios Royal Fleur 2 in 1 punch  and I've added 2 little Mini Butterflies


See you soon with more!


Tuesday, 24 April 2012

New Tonic Studios Giveaway

Tonic’s Glass Cutting Mat is an essential addition to any serious crafters arsenal. Complete with popular card size markings & angles. Not only will this protect your work surface, it is easy to wipe clean and gives a lovely smooth surface for your crafting.
With all the features of it’s ever popular larger sibling, the brand new A4 Glass Mat is bound to be an instant hit. Our  A4 Glass Mat has centimeter rulers and popular card size markings making it the ideal ‘must have’ for cardmakers!
When using a glass cutting mat  you'll find that  less pressure is needed with your craft knife and so it is easier on your fingers.  Also you'll find that your cutting blade will glide along without dragging or jumping as there are no indents left in the mat from previous cuts (as sometimes happens with self healing mats.)
Our A4 Glass Cutting Mat is particuarly recommended for use with the Shape~Mate system.

How to Enter...
To win one of these little beauties, you need to be a follower of  BLOG TONIC or our facebook page, then leave us a comment on BLOG TONIC  telling us why you would like to win one of these handy sized mats.

For a second entry into this "cutting edge design" draw you can post about our giveaway on your blog, facebook or twitter and then leave us a second comment on BLOG TONIC telling us where you shared. (Please don't forget to leave that second comment if you want two entires)
 PLEASE REMEMBER TO LEAVE YOUR COMMENTS ON BLOG TONIC AND NOT ON THIS BLOG!!
If you'd like a button for your blog sidebar, you can use this one...

Blog Tonic
<div align="center"><a href="http://www.blogtonic.co.uk" title="Blog Tonic"><img src="https://blogger.googleusercontent.com/img/b/R29vZ2xl/AVvXsEg3OdpD6WmF_0OiKa_1RiVNzwnMwetuxCeHba50he4opTvtEoC9n9CHvzvKD_kcqFk-ZbDOgeZ0ypMv4EHOQV48iLkvT7GaT6bZuW59Xtho7Pf16DoMp9fy1OGzS31vt8fz5djkehet190/s1600/winmat.jpg" alt="Blog Tonic" style="border:none;" /></a></div>

We look forward to reading your comments.

Prize draw will close on the 15th of May 2012

Please note this prize draw is for those living in the UK and European Union. Thanks

Thursday, 19 April 2012

My new favourite!


You're going to love the new border punches from Tonic Studios!! I've used the gorgeous new Victorian Border on the bottom of the actual card  - the fantastic geared system in these punches means they punch through card and paper equally easily - and also on the matching designer paper above it. I just know I'm going to be using this punch lots...
I'll be showing you the rest of the new range over the next week or so, so keep your eyes on the blog.


The other Tonic Studios punches I've used on the cards are Butterfly Strip (you can see how I made the circle using it  HERE) , Dotty Border for the rosette, Petal Pairs for the centre and, of course(!) the Multi Detail Butterfly.


 For the little corner bookmark I've used the same Moorish paper, Petal Pairs and Dotty border.

 Tonic Studios are promoting their Facebook site. For every 1000 likes they get (capped at 5000) they will enter all the followers into a draw to win £100 worth of Tonic prizes. If you are not already a follower, check it out HERERemember to share the post on your facebook wall to spread the word.

Thursday, 12 April 2012

Lilac and gingham


Gingham again....I'm going to have to buy some more gingham paper as my supply is running low!
There is something about it that really appeals to me - and I just love it with flowers and stitching.

The image on today's card is Scabious from A Passion for Stamps and the paper is Papermania Colossal and Craft Creations gingham. This Tonic Studios Daisy Border punch always looks great when it has some stitches on it - I've used it before with "running stitch" but this time I used "blanket stitch"  and I love the effect!
The flowers around the bottom of the image were made using the Tonic Studios Simplicity Geared Daisy punch....soo easy to use. And, of course, I've added my favourite  Multi Detail Butterfly  which I've layered with a gingham one on top to match the paper.

Don't forget to visit Blog Tonic where there is a "sticky stuff" giveaway

Challenges
Crafty Ribbons ...things with wings
Paperplay ...things with wings

Sunday, 8 April 2012

Happy Easter


Today I'm sharing a card which is one of a set of Spring flower cards I made lately. This one uses Tulips digi image from A Passion for Stamps and I've used my lovely Tonic Studios Floral border punch to edge the mat before attaching it onto white card which I embossed with Cuttlebug's D'vine Swirls folder. Then I used the Tonic Studios Royal Fleur 2 in 1 punch in a slightly different way - by actually using the "negative" part.


I'm looking forward to a couple of days off work to spend with the family over the Easter weekend. We've nothing exciting planned - just a bit of a rest.
Last night we went to Belfast to have a look at the laser and firework display at the new Titanic centre which opened in Belfast last week....I was one of the few folk who didn't know a ticket was needed until they were all sold, so 30,000 other folk had a much better evening but we, at least, were able to watch the fireworks from beside Goliath - the huge crane in the Belfast shipyard where the Titanic was built.


I'm no photographer but I thought you may like to see a little bit of Belfast.

Thursday, 5 April 2012

Daffodils


Good morning. I think we may have returned to Winter  - after a little glimpse of what felt like Summer last week - but the Daffodils are still blooming and I thought I'd make a quick card with a couple of them on it to brighten someone up.

The Daffodils are digi images from A Passion for Stamps and, as usual, I've coloured them with Promarkers (Canary, Gold and Orange).
The back layer was embossed with Cuttlebug's Distressed Lines folder and then I got punching....

The banners were made using Tonic Studios Paper Edger 4 and their mini Trimmer.
I've used the gorgeous Tonic Studios Simplicity Geared Vine Border punch for the top part and added some gingham ribbon.

Tonic Studios have a super giveaway of glues and other super stuff on their blog at the moment so why not nip over and join in..
You'll find it HERE

Challenges
CRAFT ..Spring card
Addicted to Stamps  ..Spring
Allsorts ...photo inspiration
Alphabet Challenge ...Dry embossing
Craft Your Days Away ...Easter
Crafty Catz ..digi image
Digital Tuesday ..Easter

Sunday, 1 April 2012

Sir Stampalot Birthday Blog Hop!


EDITED 26.03.26
THIS IS AN OLD POST! I CAN SEE FROM MY BLOG ANALYTICS THAT LOTS OF PEOPLE ARE CURRENTLY LOOKING AT THIS POST AND SEVERAL OTHER  OLDER POSTS. 
I'D LOVE YOU TO GO TO MY HOME PAGE  https://apassionforcards.blogspot.com/ AND KEEP UP TO DATE WITH ALL MY NEWER BLOG POSTS AND VIDEOS. 
THANKS SO MUCH!


 My sample is a birthday card featuring my Two Roses digi image from A Passion for Stamps which I've coloured with Promarkers and cut out with my little Tonic Studios Fine Control Snips.

I've used the Tonic Studios Simplicity Geared Butterfly Border punch for the beautiful edges and the Multi Detail Butterfly and the Butterfly Mini punch for the dimension.

Before you go...I have a quick tutorial on making the card front.
1. Cut a rectangle measuring 15cm x 13 cm and score at 1cm and 2cm on the 15cm side.Cut an oval aperture with the Tonic Studios Oval Shape Mates

2. Stick the image to the card base using Scrap Adhesives foam pads


3. After embossing the front panel, fold the edges back and stick it to the card front  -  2cm in from each side


Saturday, 24 March 2012

80th Birthday card


Good morning. I'm so glad it's Saturday! I've got lots of housework to catch up on but I'm definitely taking some time to craft. It's been a hectic week and I think I deserve it.... 

Before I start anything else I thought I'd share this card with you. It's for a good friend who will be 80 next week. He always like to get a card with a dog on it but this time I decided that his big milestone needed to be the focal point so I cut out the numbers using Colour My World templates and matted them onto patterned paper (Up, Up and Away) which I cut out with my TonicStudios Square Shape Mates and layered onto plain blue card.
The image is Cairn Terrier ( but I've only added some Ice Grey 3 Promarker to make it like a Westie) from A Passion for Stamps.
At the top of the card you can see the cute little metal Happy Birthday staple which I added with my Tonic Studios Embellishment Stapler...

See you soon!


Thursday, 22 March 2012

Another Wedding card


I made another silver and white wedding card but this one was really difficult to photograph - because of the plain silver I kept getting my own reflection in it so this was the best I could get!
This time I've kept it very simple - 
I cut a circle out of white embossed card and then cut a smaller circle out of silver embossed card from which I had made a mat for underneath. I used my Tonic Studios Circles Shape Mates for this and then 2 Tonic Studios Heart punches for the centre. The white and silver layers are popped up on foam pads for a bit of dimension.
That's it - pretty straightforward!

Monday, 19 March 2012

Wedding Dress

We have a family wedding coming up in a few weeks and I have a couple of cards to make. This is an adaptation of one I made earlier ( you might think it's familiar!) but I've used my new Tonic Studios Simplicity Geared Border punches this time and here's how I did it...


1. Cut a circle using the outside of the smallest Tonic Studios Circle Shape Mate


2. Punch 2 shapes side by side around the circle using the Tonic Studios Daisy Border punch.
(in the same way as shown HERE)
3. Mark the centre of the top of the circle , then make 2 marks 1cm either side  as above  and cut from these two outside marks to each side of the Daisy punches

4. Make a long mark from the centre of the top and  2 marks 0.25 cm from the top on each side


5. Using the Tonic Studios Dotty Border punch and the marks  as guidelines. punch on both sides of the centre to make the waist.

6. You can then use a thin embossing tool to draw lines on the dress from the waist to the side


6. Punch 2 Dotty Border shapes side by side

7. Mark and cut as shown in the photo above.
This is the bodice.
Stick this piece to the back of the skirt part.

I added the little cutouts from the Daisy Border punch, some Stickles and a few gems to finish