

You will have all the dies you need
to make the base, spine and decoration and it also contains dies to make a
little waterfall!

I have made 3 different sizes of books with the set

and you can see how to make the largest and the smallest in my video here –
In this Step by Step tutorial I will take you through the process of making a medium sized book with various pages and pockets.

The 2 large die sets!
Making a Memory Book –
You will need the following Tonic
Studios products (affiliate links)
Memories to Cherish Die Sets
UK - https://shrsl.com/3qebd USA - https://shrsl.com/3qebb
TANGERINE AND PLATES
UK - https://shrsl.com/3ctw7 USA - https://shrsl.com/3ctwc
Craft
Perfect A4 Smooth
White Card, 300gsm
USA - https://shrsl.com/38hzz
Beautiful Memories 12 x 12 paper pad
USA - https://shrsl.com/3995l
Craft Perfect Princess Pink A4
Pearlescent Card
UK -
USA -
Craft Perfect Sweet Pink Double Face
Satin 3mm Ribbon
UK -
USA -
Nuvo Deluxe Adhesive
UK – https://shrsl.com/36e5i USA - https://shrsl.com/36e5j
Let’s Make the Book

1. Use the 17cm x 13.75cm die
to cut out the front and back covers of the book, placing the front cutting
edge at the edge of the card. Cut out a spine.

2. Cut the spine to 10.5cm long and
burnish the score lines in as shown. Adhere both the mountain fold together
with hi tack tape or wet glue.

3. The finished spine.

4. Cut the ends of the covers from
the A4 card leaving 3cm on each. Score and fold as shown and glue together to
form a cover.
NB If you want more pages, you can
cut these covers with extra card on the open edge and add another spine beside
the first one.

5. Glue the spine into the inside of
the covers.
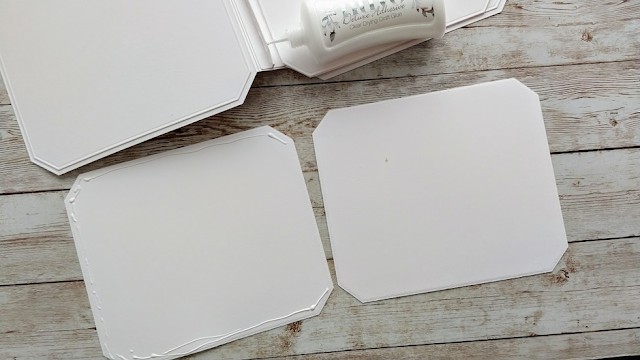
6. Die cut 6 of the slightly smaller
layering dies to create pages. Glue one to the inside front cover and one to
the inside back cover. Create a page by gluing 2 die cuts together leaving one
short side free from glue. Add glue down both sides of one of the page
connectors in the spine and position the double -sided page over it. Repeat
with the other page.

7. Die cut pink mats and patterned
paper layers for the covers and glue in place. Add a 2.5cm x 10cm strip of pink
card with a 2cm x 9.5cm layer of patterned paper on top to the spine. Die cut
the sentiment from white card and glue onto a pink die cut backing plate. Glue
to the bottom right of the book front.
 Page 1.
Using the dies shown, adhere a pink
mat. Then attach a 2.5cm x 10.5cm strip of patterned paper to a 3cm x 11cm
strip of pink card and attach this down the centre of the page with hi tack
tape at the top and bottom. Create tags with the smaller dies on the left.

Using the dies shown, adhere a
patterned paper mat.
Attach the sides and bottom to the
page with glue/hi tack tape and make a tag with the bottom two dies in the
photo.

Using the dies shown cut and glue a
patterned paper mat onto the page.
Die cut the small pink shape with the
slits and thread a 7mm x 10.5cm strip of white card through the slits before
gluing the top and bottom of the strip to the page.
Create a tag and slip in behind the
strip.
 Page 4.
Using the dies shown die cut a white
waterfall piece and strip. Burnish all the score lines well. Thread the strip
through the slits in the main piece. Die cut 4 white shapes and 4 patterned
paper panels. Glue together.

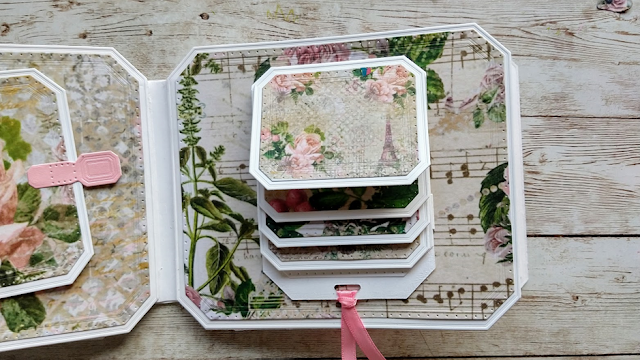
Glue the tops of the patterned pieces
below each of the burnished score lines and add a ribbon loop at the bottom.

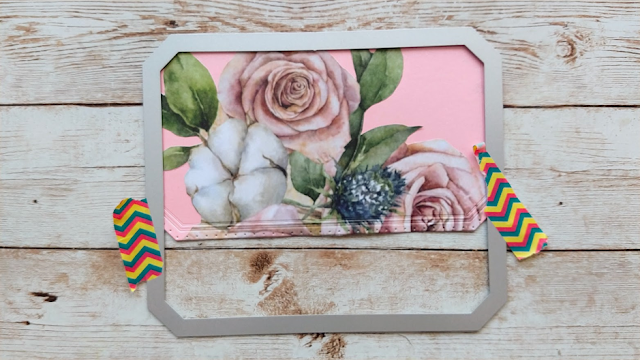
Using the dies shown on the left,
firstly cover the page with a patterned paper mat. Then turn the large die 90 degrees
and cut a white pocket (cut in half) Use the smaller die shown to cover with
patterned paper.
Use the dies at the top of the photo
to create a tag, cutting off the patterned paper to keep it symmetrical.

Using the dies shown, add a pink
panel to the page.
Leave a tab of card on one of the
smaller white die cuts and cut it off the other.
Add glue to the inside of the tab and
glue to the back of the second panel to create a small card.

Add a patterned paper panel to the
front of the card.
Using the 2 dies on the right, make a little fold over tab. Score down the side to create the tab.

Glue a patterned paper circle to a
white card circle and attach to the large “card” with a 3D foam pad on one
side. It will act as a closure for the smaller flap.
Don’t forget that you can add as many
pages and photos tags etc as you like.
When you’re using a large 12 x 12
paper pad, remember to be creative and fussy cut lots of elements from the
paper to glue onto your tags.
Lastly, but most importantly….enjoy 😊
I will follow your instructions when I get my die. Thank you so much for the instructions. I'll let you know how it turns out. :-)
ReplyDelete