
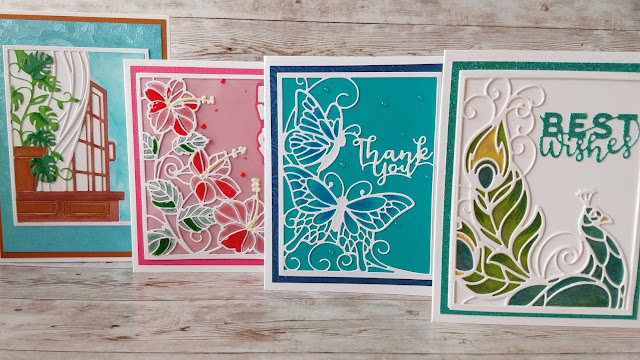
These are 4 different cards which I made with the Scenic Sentiments Showcase die set.
If you'd like to check this set out, these are my affiliate links
USA - https://shrsl.com/3e15k
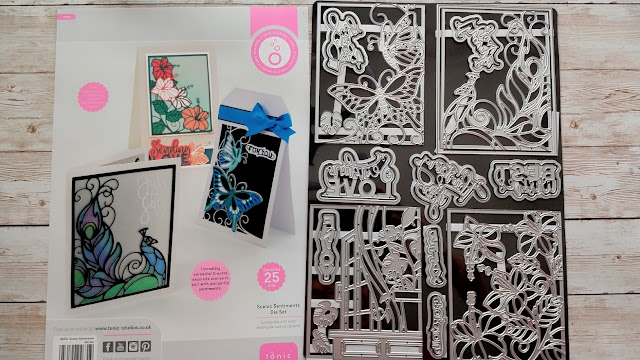
The Scenic Sentiments Showcase die set contains 25 dies in total. There is a 9.75cm x 12.75cm rectangle die and 4 different "scenes" which fit inside it.
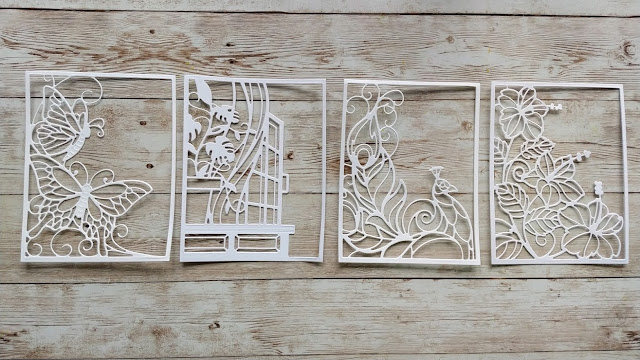
a) 2 butterflies b) an open window with a tropical plant on a window ledge c) a peacock and d) hibiscus flowers.
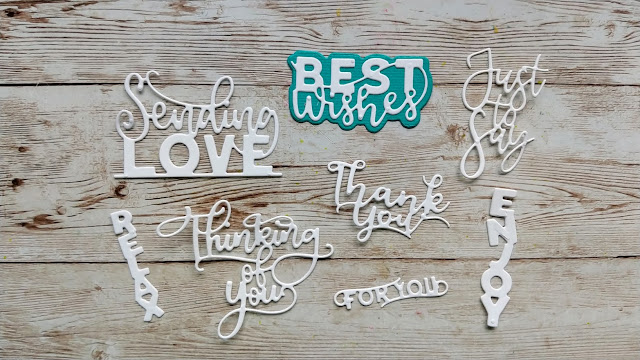
There are also 8 different sentiment dies with all have backing plates.
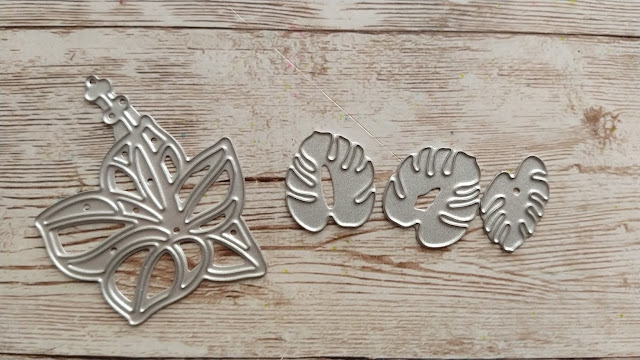
There are also 3 leaves which match the window scene and a single hibiscus flower which can be used with the spray of hibiscus flowers.
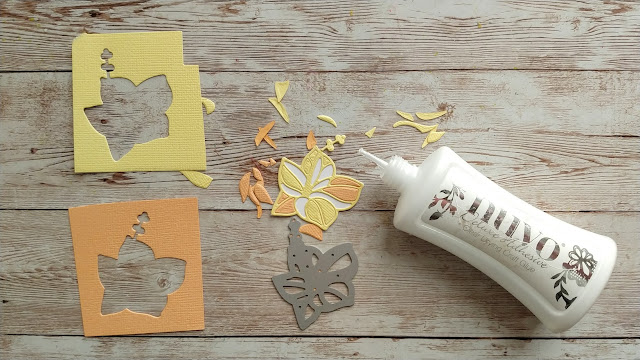
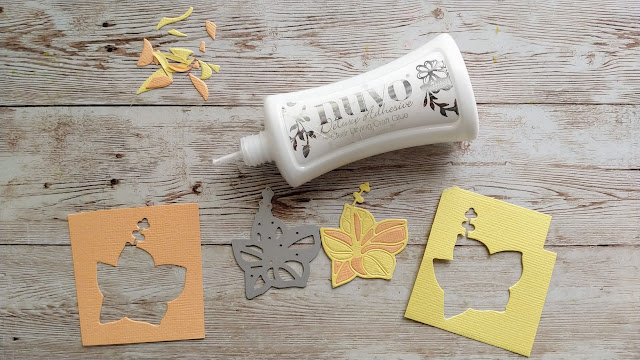
All of the scene die cuts can be paper pieced. You can also paper piece the single hibiscus flower and this can be done in a single colour or, as I have done here, you can add complementary shades. Nuvo Deluxe Adhesive is great for this job! I have glued the flower onto a piece of white card and cut around it first but you could add it straight to your card and paper piece there.
There are so many different ways of using this set that the only limit is your imagination. I have cut out all my shapes from white card but obviously they can be cut in any colour you prefer and would look very dramatic in black!
One way to use these would be to paper piece them and use different colours of card to fit back into the areas which have been removed. I've steered away from this more obvious use to give you some different examples and ideas.
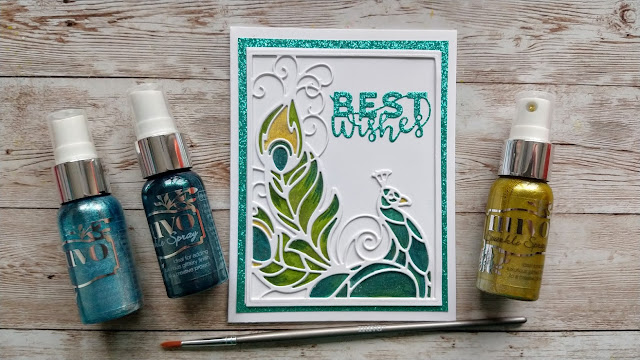
I fell in love with this peacock as soon as I opened the packet and knew I had to make it sparkle!
I glued the die onto a white rectangle and sprayed some Sparkle Spray into a container and used a fine Nuvo paint brush to pick up the colours and colour the peacock. You really need to see this one in real life to get the full bling effect! I added a second white die cut over the top to keep the outline crisp and clean.
You can see how I did this and also the card below in my video here -
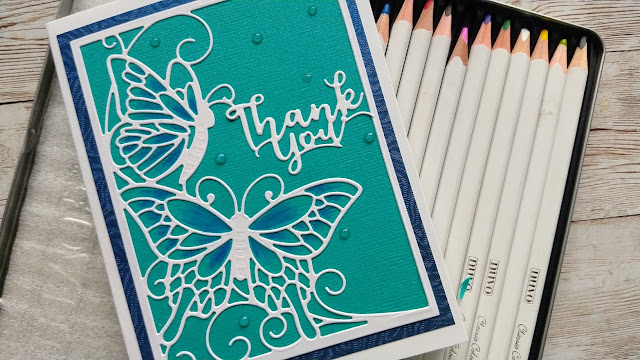
Another way to make a card with the set is to add some colour and depth with Nuvo pencils. In this example I have layered the butterfly die cut onto Ocean Blue card and then added shading into the wings with True Blue and Scuba Blue Classic Colouring Pencils. This is a much quicker way to make a card than the previous one. Just add matching card and Morning Dew Crystal Drops to make your card pop!
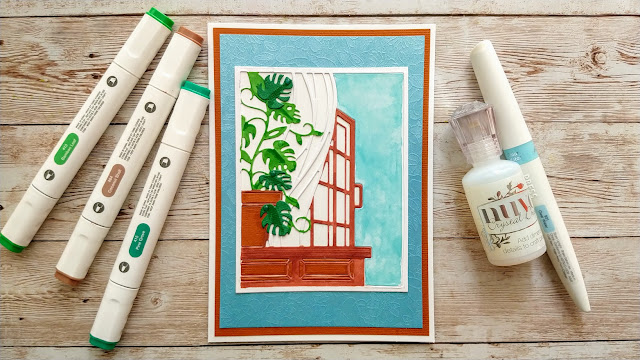
The die cuts don't have to be left plain white and in this example I have coloured the window and plant with Nuvo alcohol markers.
It's a good idea to reserve the larger "waste" parts from the right sides of the die cuts as you can colour these in different ways and glue them back into place.
I've also paper pieced some of the other pieces back into this die cut but left some open. Don't be afraid to mix and match!
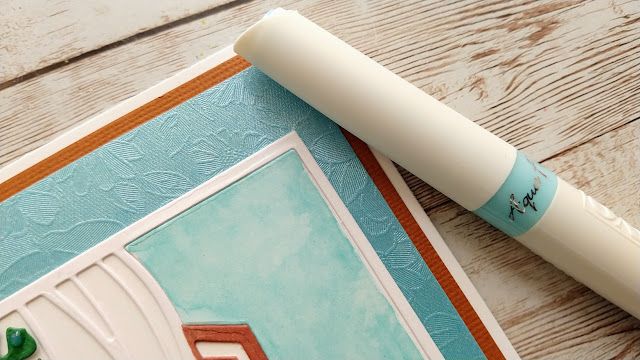
You could use many different mediums such as watercolour pencils, shimmer powder. mousse etc but I have used the Clear Water Aqua Flow pen to colour the sky in the window scene above and then smudged it slightly with a paper towel to give a cloudy effect.
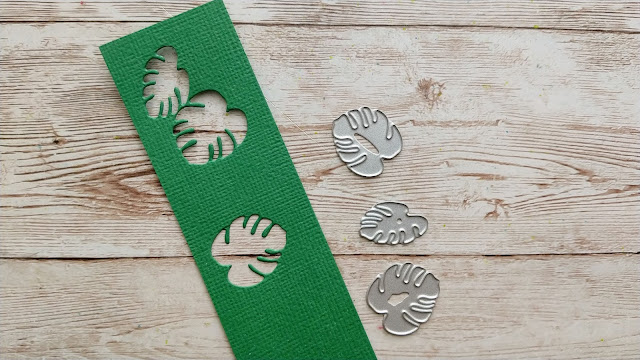
I have also used the extra leaf dies to add some more detail onto the plant and I've added some shading to these with the Pine Grove Nuvo Alcohol Marker.
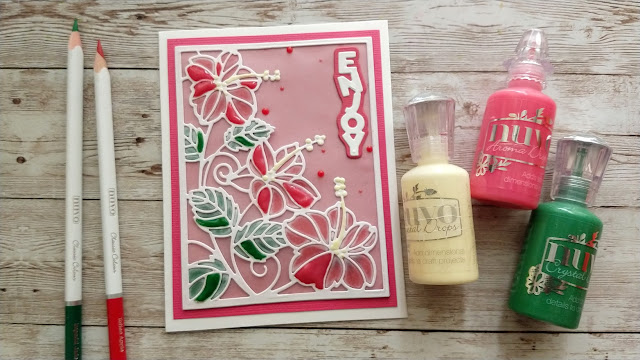
The Hibiscus flower scene die cut can be used in many different ways, not least paper pieced! This would be perfect for adding different depths of the same colour back into the flower heads to make them pop!
For my example I have coloured the back of the petals and leaves with red and green Classic Colouring pencils and then glued the die cut onto vellum. Because vellum has a very translucent quality, I wanted to add more punch so I added some Crystal Drops into random petals and leaves and some Buttermilk Crystal Drops onto the styles and anthers of the flowers.
I'm sure there are many more ways in which you could use these dies!
Enjoy! :)
No comments:
Post a Comment
Thanks so much for taking the time to leave a comment, it's lovely to hear from you. Ruth