

I've made a full tutorial of all...yes all..the steps in making the Trimcraft Santoro "Pursuit of Happiness" card which I demonstrated at the trade event in the City West Hotel, Dublin last week. It is primarily a reference for those who were there and actually made the card with me. I really enjoyed myself and I hope you did too. I was really happy to see so many of the finished cards signed, sealed and ready for Mother's Day by the time I got to have a look at the results!
I have to warn you that this post is photo heavy! Many of the steps only actually take a couple of seconds but it's all here for you (and your customers) to refer to.
You will need..
Dovecraft 5x7 Ribbon threading card DCCE013
Dovecraft Silver Mirror card DCBS40
Trimcraft Santoro Mirabele A4 paper pad SNPAD002
Santoro lace ribbon SNRB001
Santoro Wooden keys SNWC001
Promarkers
(Almond, Sunkissed Pink, Coral , Ice Grey 3, Marsh Green, Shale and Blender, optional)
Double sided tape

These are the supplies you will need to make the card as a base for your stamped and coloured image.
Cut the silver card to 10.5cm x 17.5cm and 9cm x 13.5cm.
Cut the patterned paper to 10cm x 17cm.
Let's get started!

1. Colour the 2 wooden keys with the Sunkissed Pink and Coral pens and leave aside to dry.

2. When they have dried, thread the lace ribbon along the edge of the card and thread the keys onto the ribbon at 3 loops from the top.

3. Carry on threading the ribbon to the top and secure the ribbon on the inside with tacky glue.
You can leave this part aside now and move onto the image.

1.Stamp the image with the Pursuit of Happiness stamp using a waterbased inkpad and acrylic block onto good quality card or bleedproof paper measuring 8.5cm x 13cm

2.Have the Promarkers which you are going to use ready along with at least one fine nib.

3. Colour the face with the Almond marker using a circular motion.

4. Use Sunkissed Pink to shade the cheeks, temples, under the hairline and to colour the lips.

5. Colour over the whole face again with the Almond marker to blend the Sunkissed Pink in and add shading to the inside corners of the eyes.

6. Use the Coral marker to colour in alternate stripes on the hat.

7. Colour the other stripes with the Almond marker.

8 Now add the fine nib to the Coral pen and add some shading to the edges of the coral stripes.

9. Using the Sunkissed Pink add shading to the edges of the Almond stripes.

10. Now take the same Sunkissed ink pen and make little sweeps towards the centre of the Almond stripes but don't go right into the centre.

11. To soften the effect of the Grey marker on the collar I have gone over the entire collar area with the Blender pen before colouring. This is optional..

12. Do a little shading in the "creases" with the Ice Grey 3 marker.

13. Then go over this again with the Blender pen to soften.

14. Colour the flower with the Sunkissed Pink marker.

15. Add a fine nib to the Marsh Green marker and colour the stem and leaf.
NB. If you are reusing a fine nib from another colour, remember to "scribble" the first colour out onto scrap card before you colour with it.

16. Add more depth to the flower with the Coral marker and add another layer of shading to the leaf when the first layer has dried ( it dries very quickly)

17. Colour the hands with the Almond pen and add shading at the cuffs with the Sunkissed Pink.

18. Colour the top with the Ice Grey 3 pen.

19. Add extra shading below the collar at the sleeves and at the waist.

20. Colour the outline of the skirt with the Sunkissed Pink pen.....and move quickly onto the next stage so the ink is still a little damp.

21. Now colour the skirt with the same Sunkissed Pink pen this - time using the chisel nib at the other end of the pen and moving in a circular motion.

22. Add shading as shown with the Coral marker.
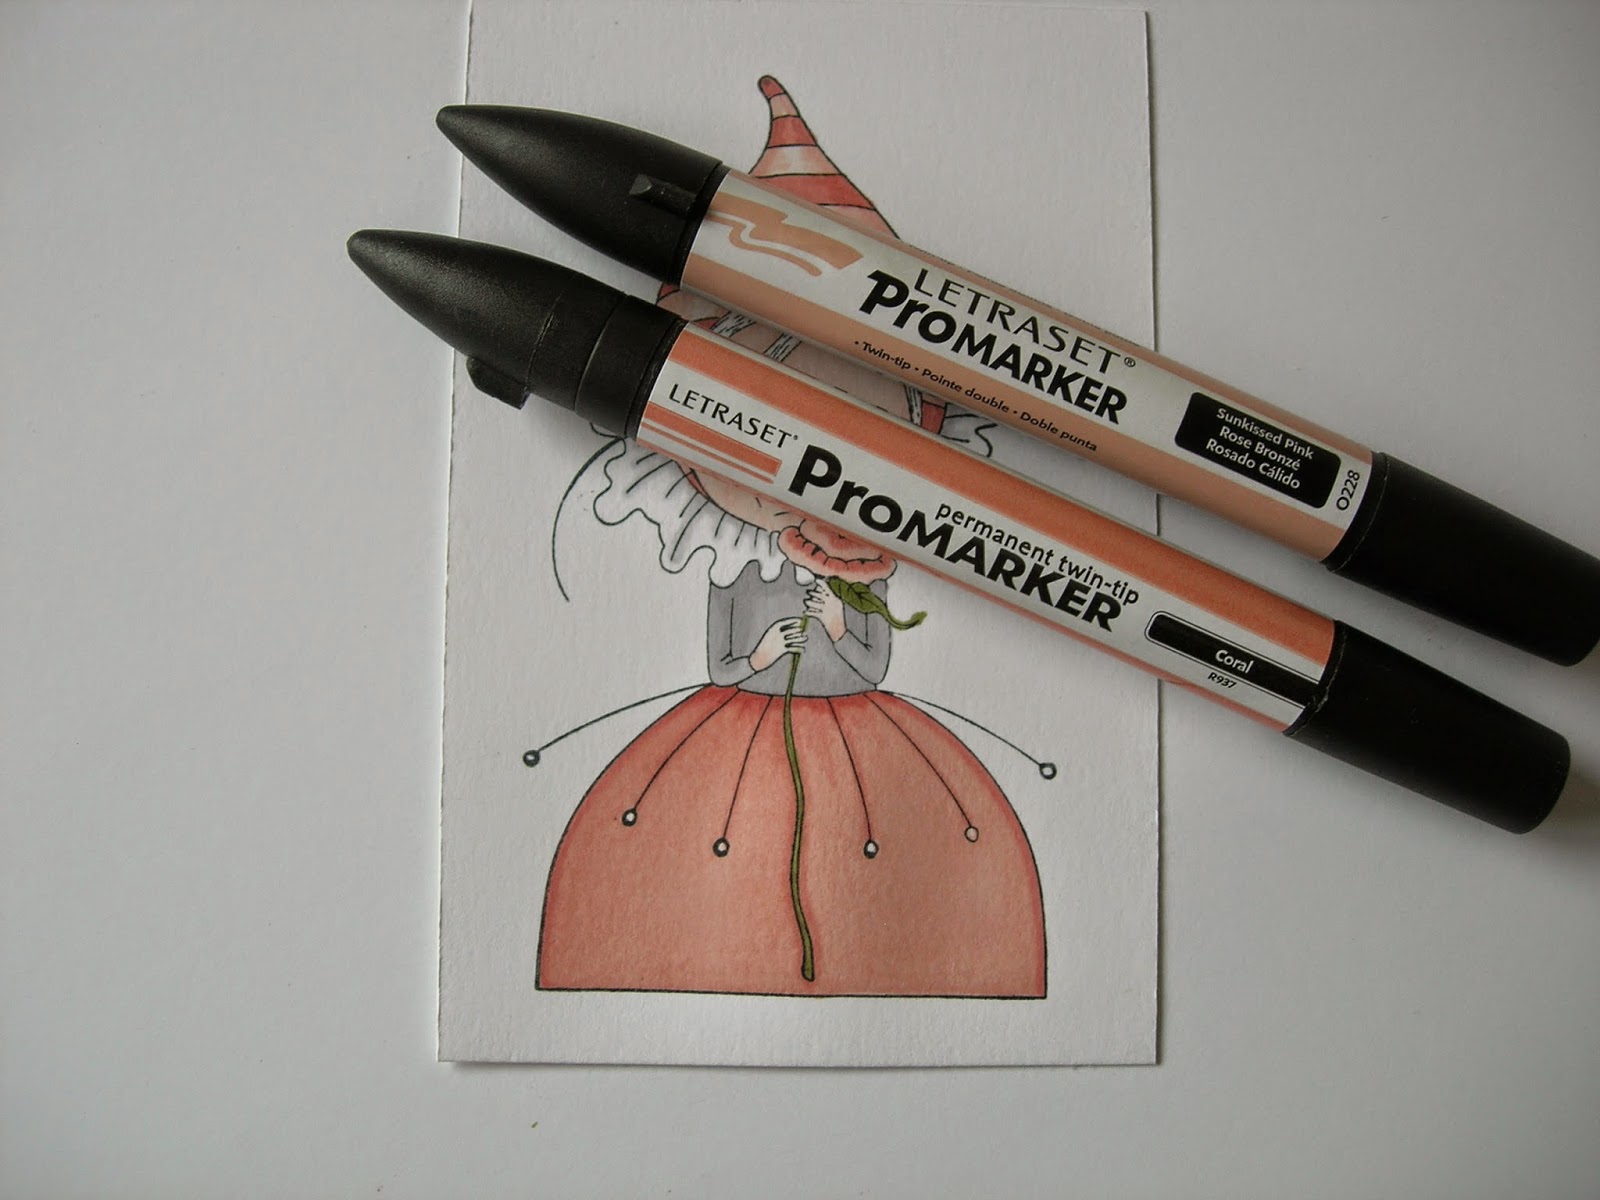
23. Go over the whole skirt area again with the Sunkissed Pink pen to blend in and add a little more Coral detail at the waist when this has dried.

24. Using a fine nib on the Shale pen colour the hair.
NB. If you are reusing a fine nib from another colour, remember to "scribble" the first colour out onto scrap card before you colour with it.

25. When the first layer of Shale has dried remove the fine nib and add some shading to the centre of the hair area.
That's the image finished (!)
so you can now attach it to the card as follows..

Matt the image onto the smaller piece of silver mirror card using double sided tape.
Matt the patterned paper onto the larger piece of mirror card.

Matt them together as shown.
Now you can attach it to the card front, sit back, sigh and give yourself a pat on the back!

Enjoy!! :)
Fantastic tutorial Ruth, love the image. Alison xx
ReplyDeleteWhat an excellent tutorial in Promarker colouring. I don't do cute, I'm afraid, but the execution of this card is brilliant. Thanks for sharing your technique.
ReplyDeleteThanks for the tutorial - you make it sound so easy!
ReplyDeleteClur
x
Wonderful ! Thanks for the tutorial ! xxx
ReplyDeleteGreat tutorial. Have had my promoters in my drawer for a few years....time to show them some paper.
ReplyDeleteThank you so much.