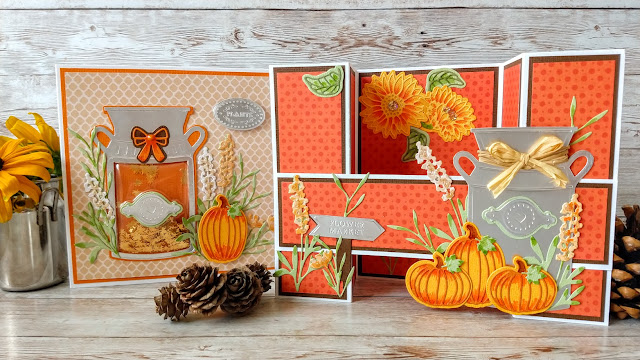
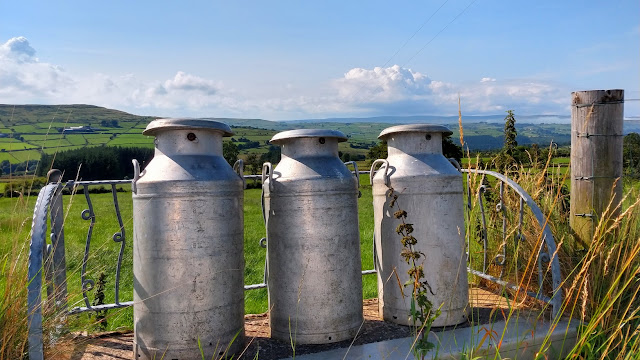
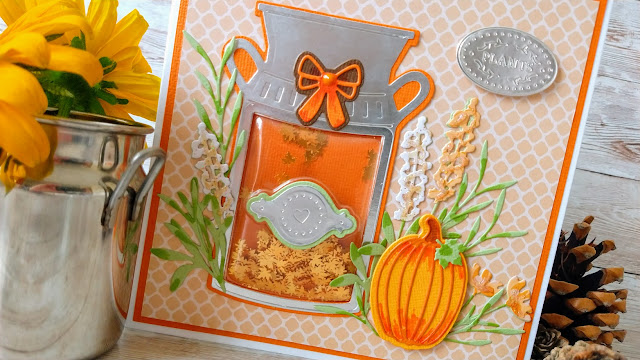
I saw these milk churns up in the hills of Country Antrim earlier in the year and this set reminded me of that beautiful day.
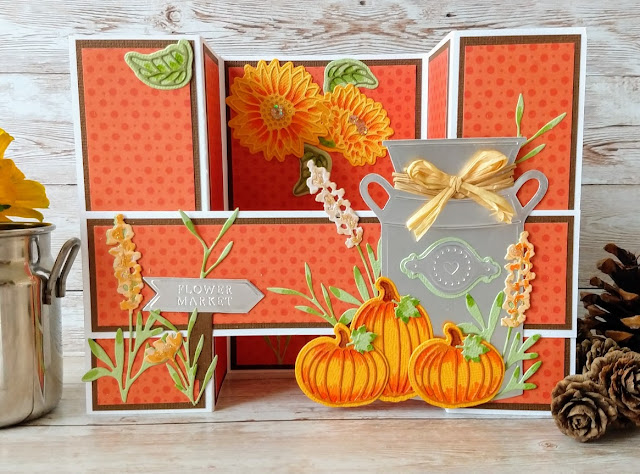
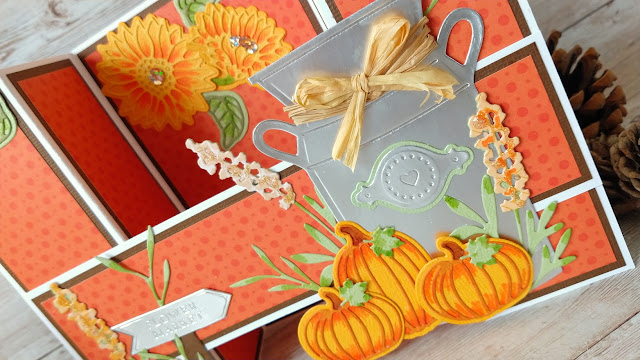
I've used the set along with the Harvest Moon paper pad to create 2 beautiful cards. One of these is a simple bridge fold but it looks great with all the die cuts from the set. I've layered the die cuts and added in extra detail with Nuvo alcohol markers for depth of colour and also popped up some elements with 3D foam pads.
Please let me know what you think of these :) I think Autumn is my favourite time of year. The colours of nature are simply amazing.
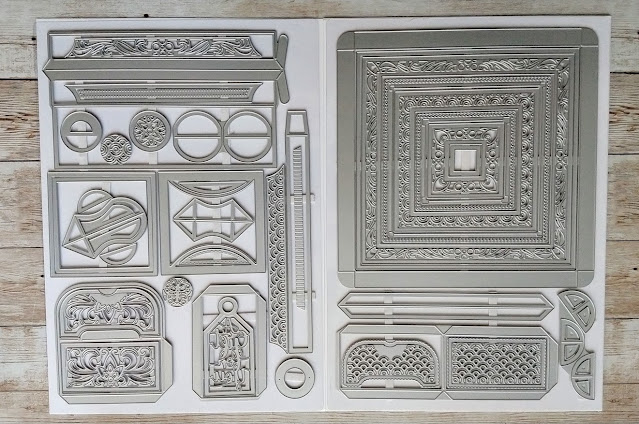
This is a fab large die set with 2 A4
sheets covered in dies! There are 56 dies in total!!
You can use them to create many
variations and sizes of memory books but you can also use the dies to create
cards and other projects.
In this Step by Step tutorial, I will
show you how to make the basic book with the spine and some pages and I will
also give you instructions how to make some pocket variations and a trifold
page. You can then use these ideas to create your own pages.
I have also created 2 other types of
books with the same die set and you can watch how I made them in my video here –
You will need My Memory Book – Eternal Moments Craft Perfect 300gsm Smooth White
Card Craft Perfect Coffee Cream Pearlescent
Card Craft Perfect Sage Roses Speciality Card Craft Perfect Champagne Harlequin
Speciality Card Craft Perfect Golden Mosaic
Speciality Card Craft Perfect Sienna Treasure
Speciality Card Nuvo Deluxe Adhesive Give it a Twirl Kit flower die
How to make it -
1. Tape the largest die which has one side with no cutting edge to A4 white card and die cut it 8 times. Cut out leaving some space at the side of the non cutting edge.
2. Snip 2 of them from the card, leaving 2 cm attached to the non cutting edge. Score and fold from top to bottom notch.
3. Trim the other six by cutting right down from the top notch to the bottom notch at the non cutting side.
4. Die cut the spine die from white card.
5. Score and fold as shown.
6. Glue in between the two mountain folds.
7. Glue the two pieces with the 2cm strip at the sides together, with one glue flap overlapping the other to create the front and back cover of the book.
8. Glue the spine into the centre of this overlapped 2cm area.
9. Glue 2 of the remaining 6 pages onto the inside covers of the front and back of the book.
10. Glue another of the pages to one side of the mountain folded spine.
11. Then glue another to the other side, covering the folded spine and creating one double sided page.
Do exactly the same with the next page.
12. Use the large die with the dashed line around the edges to create die cuts to cover the insides of all the white pages.
13. Using the large dies shown die cut the layers for the front cover from Coffee Cream card and Sage Roses card. Layer the Sage Roses card onto the Coffee Cream card and glue to the book front.
14. Layer the next smallest dies in Sage Roses on top, and attach a heart, and the two debossed sentiments. The flowers are made with the rosette die from the "Give it a Twirl" kit.
In the next photos you can see which dies I have used to decorate each page -
To make the trifold page:
1. Die cut the shapes shown leaving a 2cm strip on the edges of the Coffee Cream and Sage Roses card.
2. Glue the tabs in place and then glue the Sienna Treasure card over the tabs.
3. Cover the insides of the left and right pages with white die cuts.
To create the shaped pocket:
Die cut the shape shown and cut in half across the die cut. Add a trim across the top and glue to the page, leaving the top open.
To make the slanted pocket:
Die cut the large shape from Golden Mosaic card and cut from point to point as shown to create 2 halves (ie 2 pockets) Cut narrow strips of matching card and glue along the top to strengthen the opening part of the pocket.
Disclaimer:
some of the links on some of my videos are "affiliate links", meaning
that if you purchase using those links, I receive a small commission but this
will not cost you any extra.
Please consider
using these links when you visit these sites. I earn a small commission at no
added cost to you:
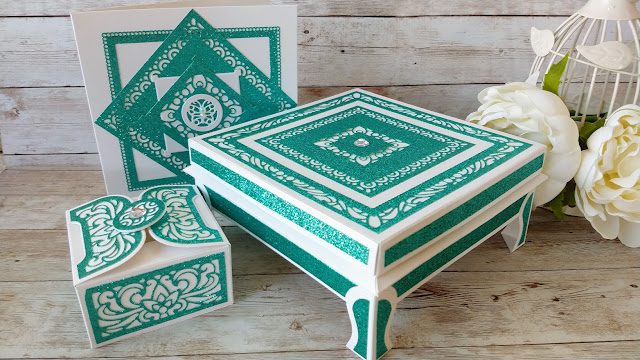
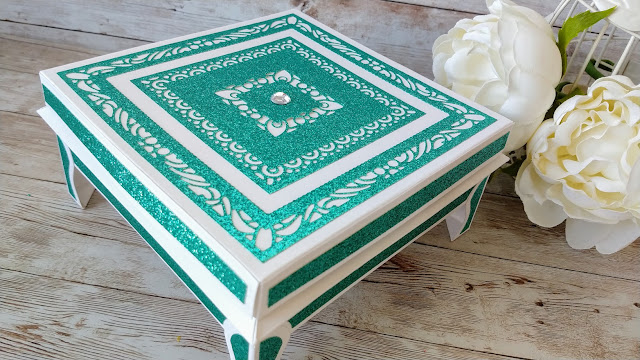
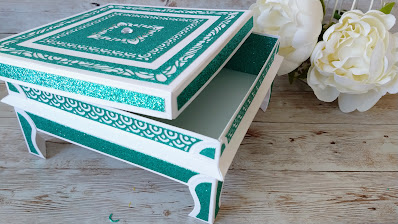
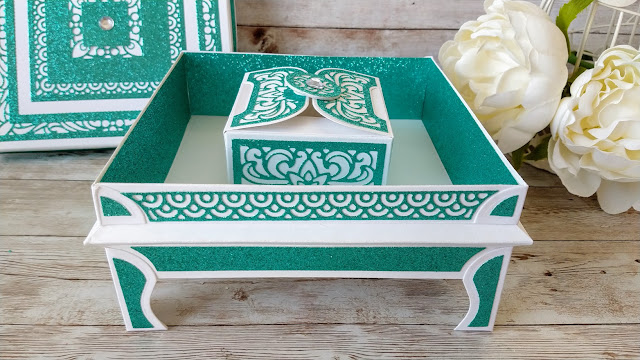
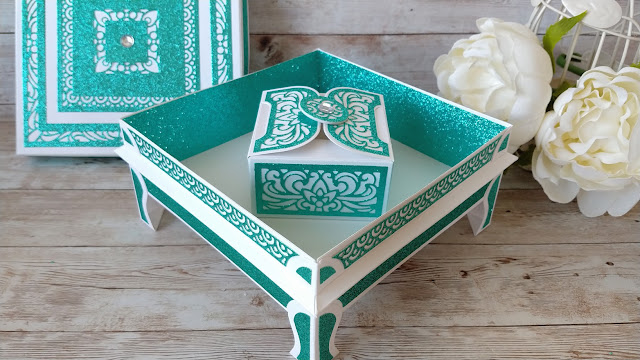
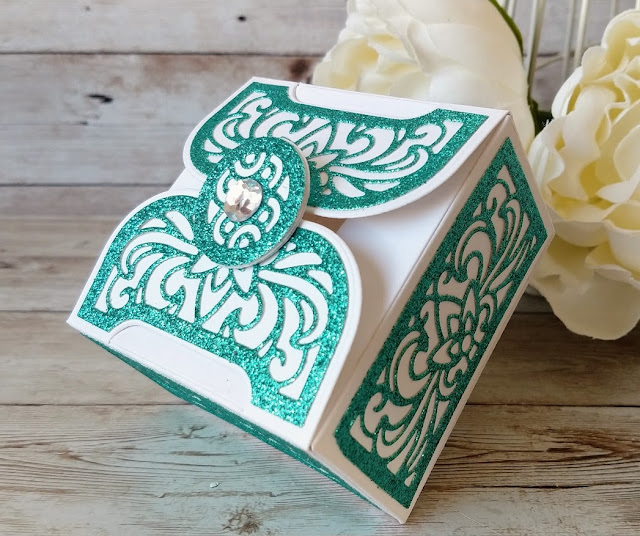
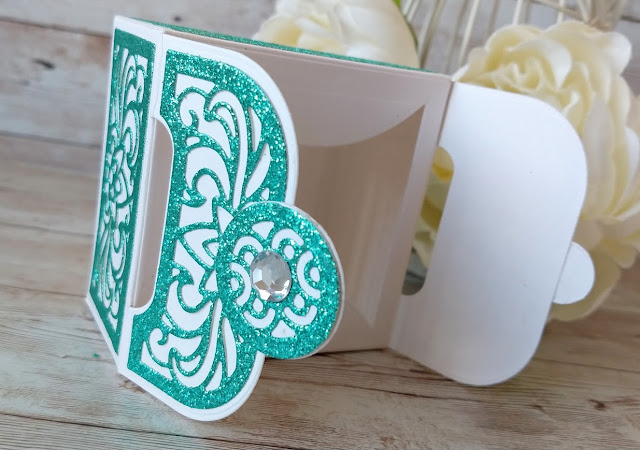
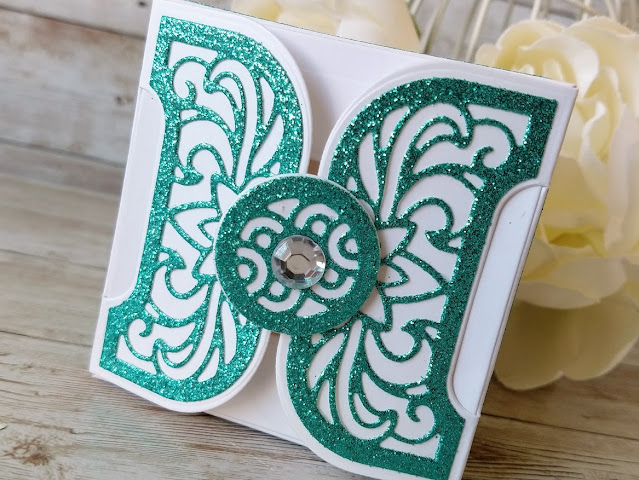
There are so many different ways to use the tons of dies in the set but I have made the large gift box, with the ingenious mortise and tenon type of joint, a smaller box which can also fit inside and a card.
The lid of the large box measures 17cm x 17cm and the outside of the box is 18cm x 18cm at its widest point. The large single layer box with legs is 8cm tall.
The smaller box measures 8cm x 8cm x 4.25cm.
I reckon you're going to get great value for money with this set because the large layering dies alone can be used to make so many things! Every available space has been used on the die sheets and it's been cleverly designed to make the biggest box possible with dies which fit on 2 A4 acetate sheets!
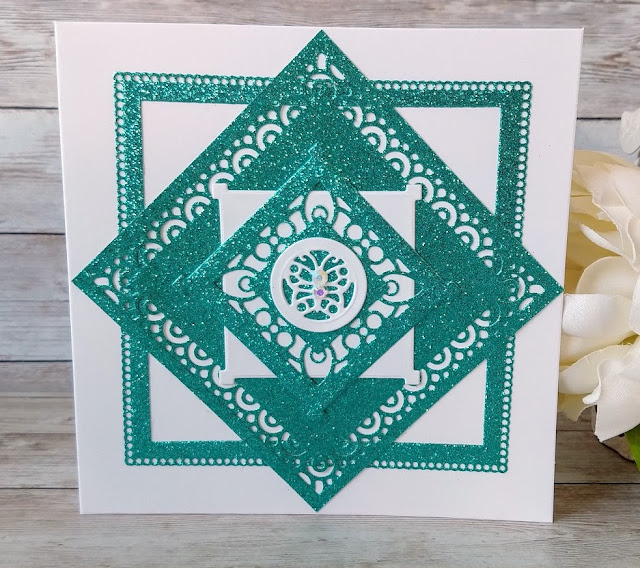
I have used Turquoise Lake Glitter card
UK - https://shrsl.com/38hzk
USA - https://shrsl.com/38hzq
I've added lots of photos below to show just some of the thigs I made with this set. No doubt you'll see that there's lots more potential with these dies!
Happy crafting!
Disclaimer: some of the links on some of my blog posts and videos are "affiliate links", meaning that if you purchase using those links, I receive a small commission but this will not cost you any extra.
Please consider using these links when you visit these sites. I earn a small commission at no added cost to you:
Tonic Studios UK - https://shrsl.com/35m6e
Tonic Studios USA - https://shrsl.com/35m6k
Cricut - https://shrsl.com/34xq7
Scrapbook.com - https://shrsl.com/34x4s
CraftStash - https://tidd.ly/3gEWCc5
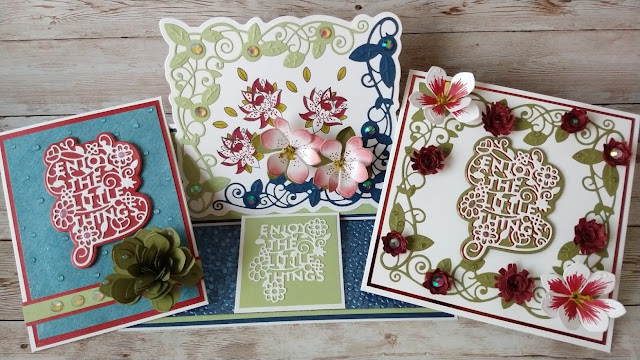
In my video I give you a walk through how I made the card on the left and the centre easel card ( in the pic above), but you can follow the steps below to make the card on the card on the right.
Craft Supplies
used
Tonic Studios Craft Kit -
Craft Perfect A4 card, Opera Red Mirror Card, Olive Green
and Maroon Red Classic Card
Nuvo Alcohol Markers, 381 black Cherry and 409 Desert
Sage
Nuvo Crystal Drops, Morning Dew
Nuvo Crystal Gems
PLUS
Craft Perfect 6x6 Bright White card
Craft Perfect A4 Bright White 300gsm Smooth Card
Nuvo Deluxe Adhesive 200n
Craft Perfect Double sided tape
Craft Perfect Dimensional Foam Pads
Tonic Tangerine Die Cutting Machine
How to make it
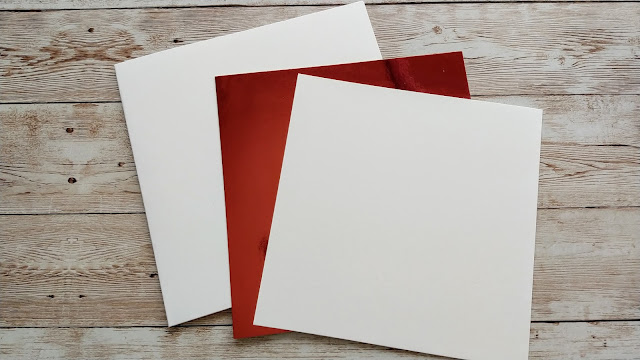
1. Layer a 14cm square of white card onto a 14.5cm square of
Opera Red Mirror card and attach to a 6x6 white card with double sided tape.
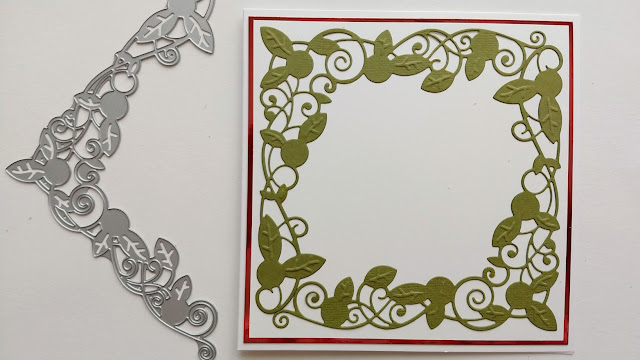
2. Die cut the large corner leaf die twice from Olive Green
card and glue to the card front.
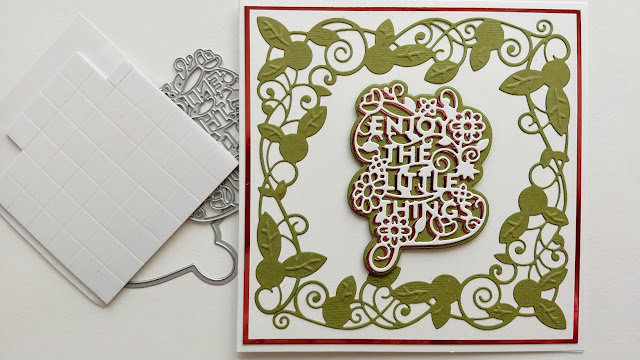
3. Die cut the word die from white card and Opera Red card
and the backing die from Olive Green card.
4. Offset the white wording onto the red wording and glue to
the Olive Green background. Attach to the card front with 3D foam pads.
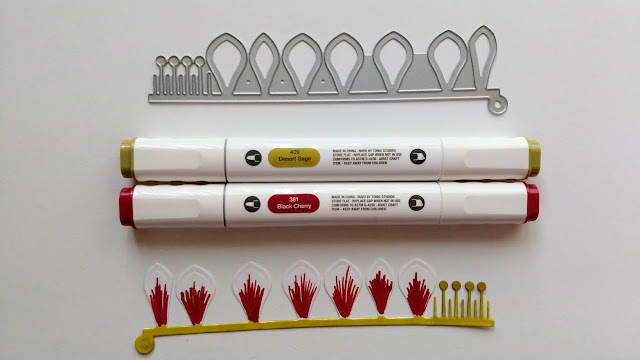
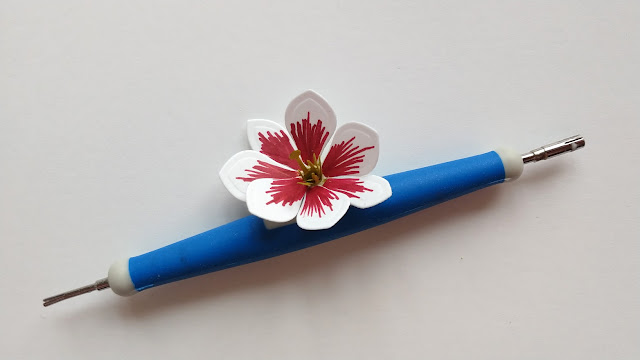
5. Die cut row of petals shown and colour the base and the
back and fronts of the anthers and filaments with the Desert sage marker. Add
flicks of Black Cherry marker to the petals. REPEAT.
6. Roll up with the quilling tool and glue the ends
together. Repeat with the second flower.
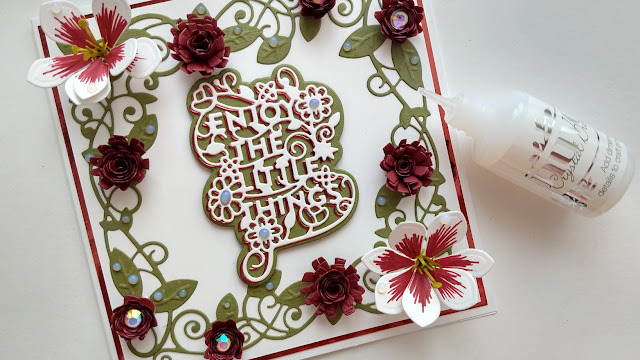
7. Glue one to the top left corner and the other to the
bottom right corner.
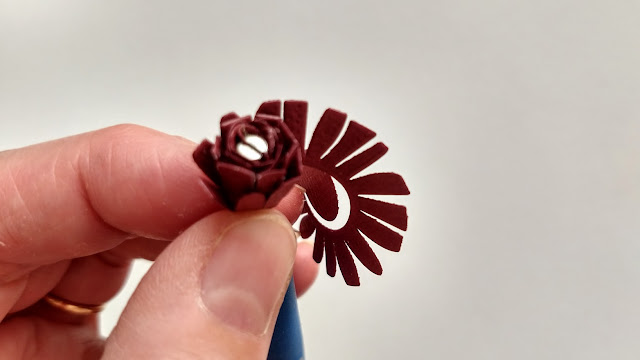
8. Die cut the smaller rosette shapes from Maroon Red card.
Repeat 3 times so that you have 4 of each flower.
9. Starting with the quilling tool at the outside, twist and
shape towards the centre. Glue the end and base.
10. Glue the small flowers as shown to the round spaces on
the leaf die cut. Add Crystal Gems into the centres of the tiny scalloped
flowers. Add Morning Dew Crystal Drops to the sentiment, some petals and
leaves.