
I've been having a good look at my large collection of punches and thinking up ways of using the same punch to
create different effects. They may not all be original or complicated but I've enjoyed the challenge. I hope to add to this page as I get time
10 QUICK AND EASY FLOWERS MADE WITH CIRCLE PUNCHES!!
NO DIES NEEDED!!
(added 21.03.26)
If you have a bunch of circle punches, grab them and follow along with me to create some stunning abstract flowers!
In this video I make 10 different types of flowers and I'll have to make another video (or 2 !) with more of the ideas I have had, including some more natural looking flowers and foliage.


Here are a few photos showing how to line up the Simplicity border punches to achieve a punched border.

1. Take note of the dashed line marked "First punch" and start your punching there.

2. Move the punched part over slightly so that it exactly covers just the part showing above and punch again.

3. Now move your punched part over so that the first punched part covers the grey template and continue in this way.
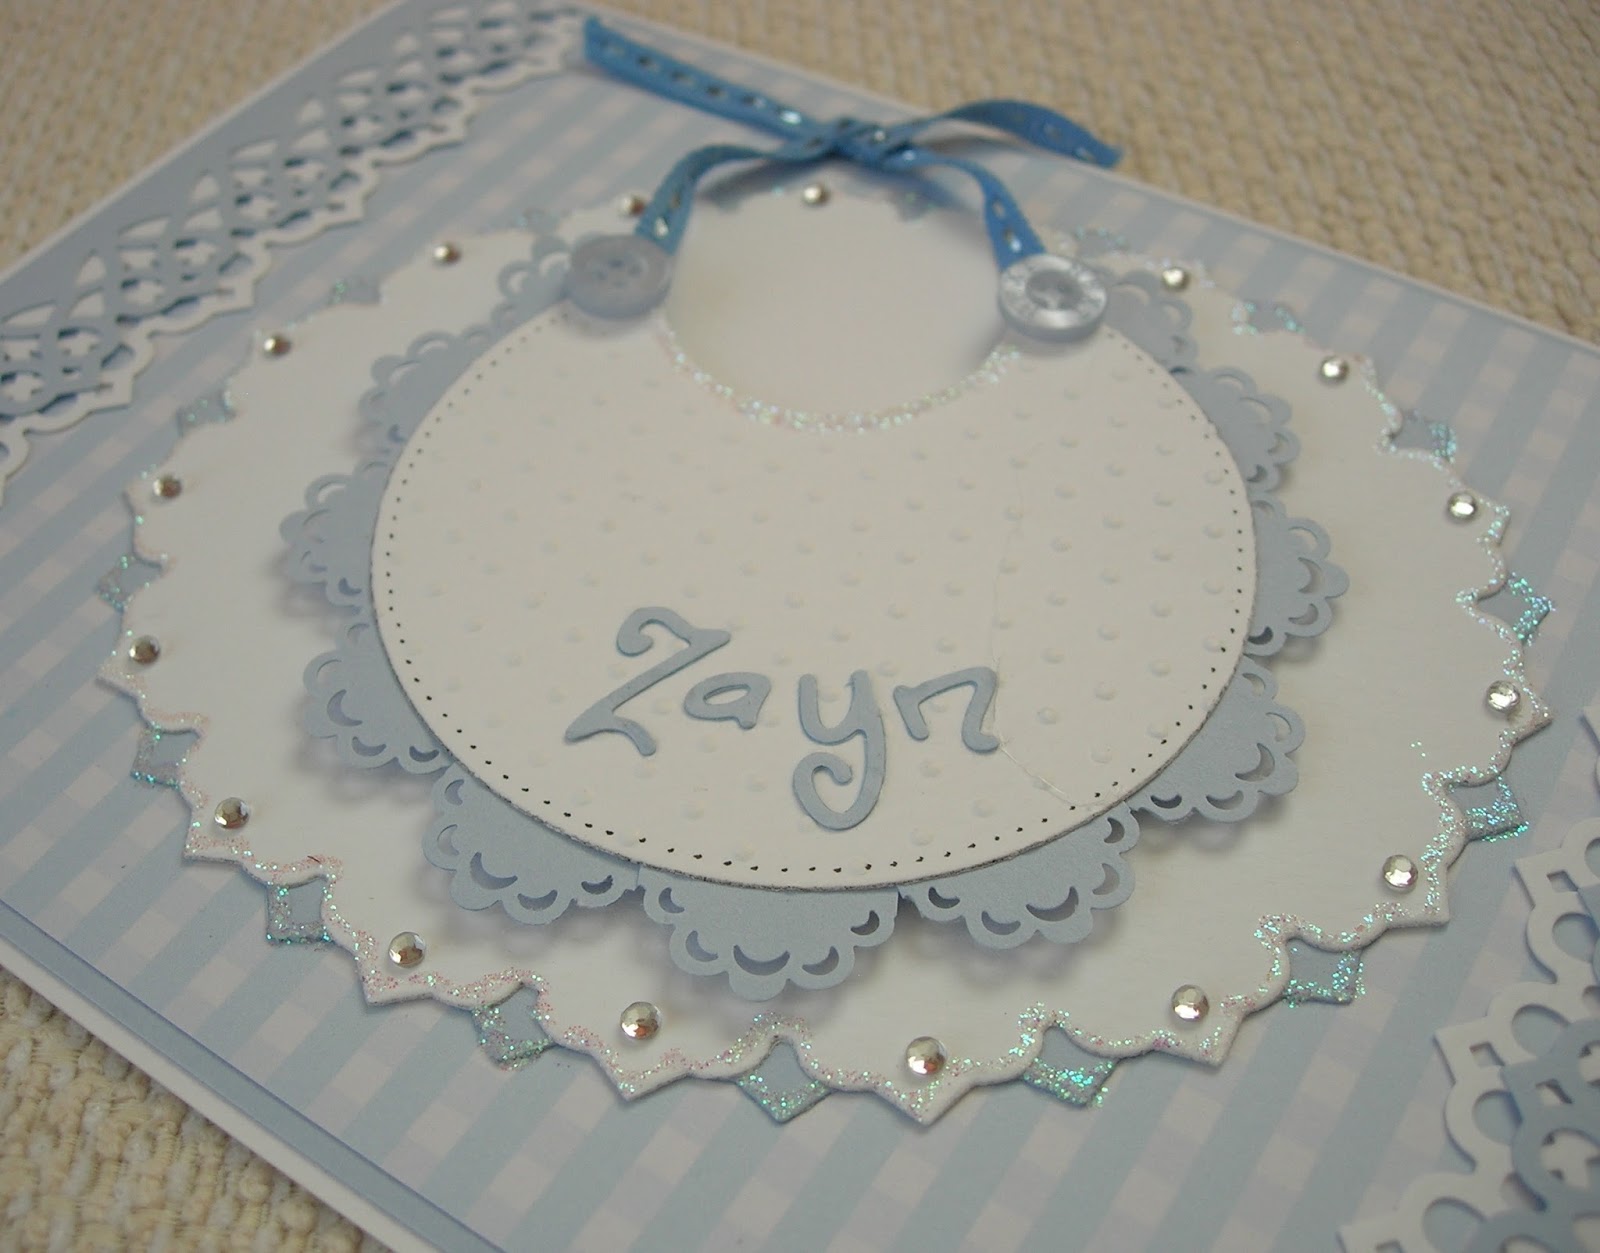
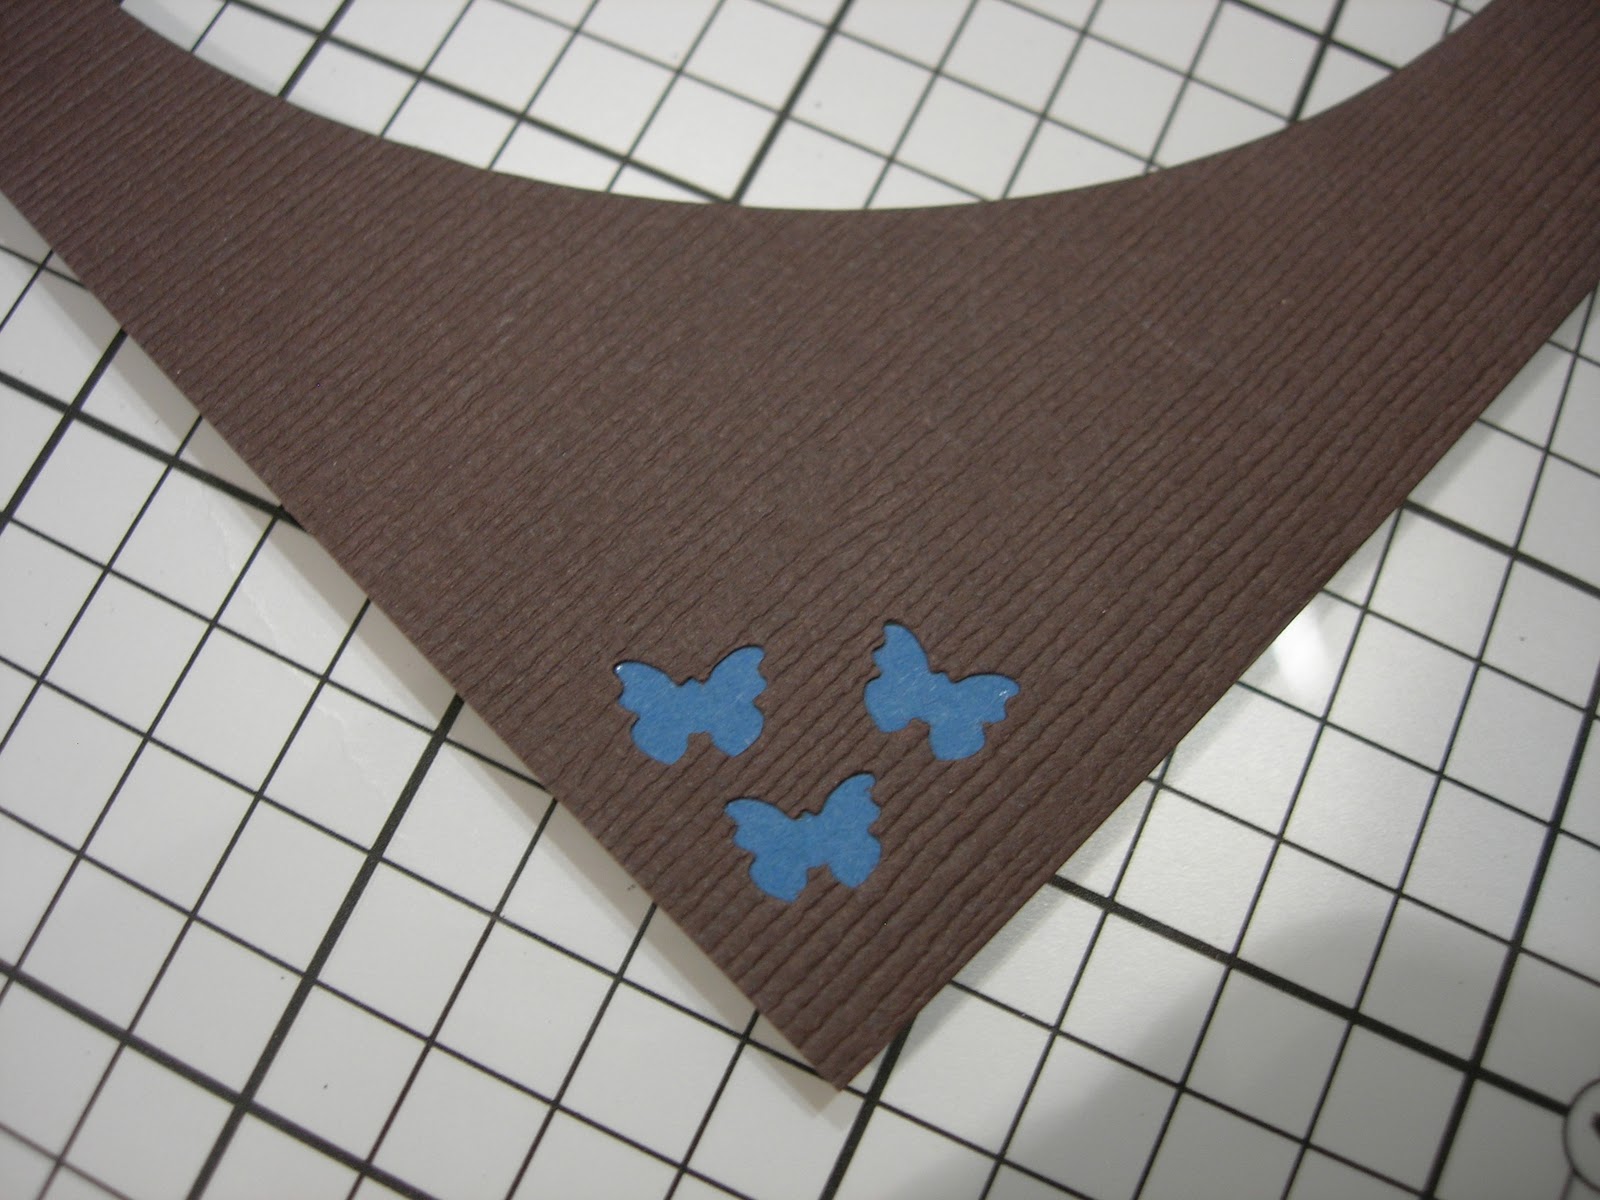
Making a bib for a baby card

I'm showing you here how I made the little bib on the card- using a circle die and the Tonic Studios Victorian border punch.

1. Die cut an 8cm circle and punch out the top of it with a 3.5mm circle punch. Then emboss with a dotty embossing folder.
Punch out a border with the Victorian border punch and cut the scallops off individually - you'll need 11 scallops.

2. Add DST around the edge and stick the scallops to the tape - starting in the centre.

3. Add more scallops overlapping slightly and making sure that there is the same size showing on the right side.

4. Snip off the piece which overlaps at the top of the bib.

5. Repeat on the other side.
Then you can decorate the bib as you like. I have added the baby's name, some faux stitching, ribbon "ties" and 2 buttons.


I've mounted the bib onto the top of my favourite Verso die cut - the Delicate Lattice (Tonic Studios) and used the coordinating border punch in blue and white.

I've mounted the bib onto the top of my favourite Verso die cut - the Delicate Lattice (Tonic Studios) and used the coordinating border punch in blue and white.
Pencil Bookmark

And now for something completely different - not a flower in sight!!
I've made a bookmark using the Tonic Studios Border System and Double Scallop punch on some card from Papermill Direct.
You'll need.......
Yellow card, kraft card, white card, silver card, grey marker, ribbon.
Border system, double scallop punch, scorer, corner rounder,double sided tape.

1.Using the scallop punch and border system punch twice to give 4 scallops.


2. Cut a 19cm x 4.5cm rectangle of kraft cardstock , mark onne end at 2.25cm in the centre and 3cm from the bottom on each side. Cut off from the centre point to the marks on the sides to create a point - then colour the point with a grey Promarker to resemble a pencil lead.

3. Trim the yellow cardstock to 12.5cm from the scallops and trim both sides. Scores from between the scallops to the top of the yellow card.


4. Cut a white rectangle measuring 4.5 cm x 3.5 cm and attach to the top of the pencil with DST. Cover the join with a 1.25 cm x 4 cm strip of silver card. Then round the corners of the "rubber" with a Duo Corner Rounder.

5. Punch a hole at the side in the silver card and add some ribbon..:)
Double sided border with ribbon

I've used the Tonic Studios Border System with the Diamond Accent punch as seen in the photos to make the decorative panel which I threaded with ribbon...


I've discovered a brilliant product for sticking all my intricate punched details to the card...E-Z Dots Mini (Permanent) from Scrapbook Adhesives by 3L.

First I punched a strip of card along both sides with the Tonic Studios Diamond Accent punch and threaded some fine ribbon down the centre.
If you look closely you'll see how I used the E-X Dots over punched areas and the adhesive is not visible on the right side. I also used it to attach the pink Daisy Border 2 punched card.

Then, to give a little dimension to the card, I attached the cut out Peony to the card using 3D foam squares from Scrapbook Adhesives by 3L.
Border System Fence

A few weeks ago when I made the Piano card I thought I would be able to make a little fence using the same Border System and double scallop punch - so here it is.
I bought this embossing folder ages ago (really, ages!) and this is the first time I've used it as I could never think what to do with it, but it seemed to fit well with this idea.
Here's how I made the fence..

1. Punch 4 times with the Double scallop punch to whatever height you want the fence and cut the scallops into 8 strips with the mini trimmer.

2. Mark the strips at 2cm from the top and 2cm from the bottom and cut 2 log narrow strips to join the fence panels together.

3. Using 3D foam squares from Scrapbook Adhesives by 3L add one to the top and one to the bottom of each strip at the marks.

4. Add the long pieces in a straight line across the foam squares and trim off the excess.
I used the Tonic Studios mini daisy punch along with petals snipped from the Simplicity Classic Daisy punch for the leaves and the mini butterfly punch at the top of the card.

This is the kind of thing I love creating - give me a punch (not literally lol!) and let me look at it from different angles to see what I can do with it and I'm happy :)
The Border System is where I started out on my journey with Tonic Studios and I always have it to hand. The first card I made with it was a Cardigan card (see it HERE) and it's been in constant use ever since.
Last night I had some scraps of white card and black card sitting beside my punches and I was having another look through the array of punches for the system when I had a "light bulb" moment.
I grabbed my Double Scallop punch and made a little keyboard..
The rosebud to the left of the keyboard is one of the Rose stamps from the Pick of the Bunch collection,also by Tonic Studios
The rosebud to the left of the keyboard is one of the Rose stamps from the Pick of the Bunch collection,also by Tonic Studios
I have used 3D foam squares from Scrapbook Adhesives by 3L to mount the black keys on top of the white ones to give dimension and I've also used the 3D thin white foam squares from Scrapbook Adhesives by 3L to mount the white keys onto the black rectangle.

It's so easy you probably don't need instructions, but here they are just in case -

1. Using the Tonic Studios Border System and Medium Double Scallop punch, punch 4 times on white card and 3 times on black card.

2. Using the Tonic Studios Super Trimmer score between each "key"

3. Cut off one "key" to leave 7 and then draw a line with a fine liner pen between each key.

4. Cut off 5 of the black keys carefully making sure they are perfectly rounded with no "bits" at the sides.
Now you've got the keys...add the black ones on top of the white ones as shown in the photo - mounting on 3D foam squares.

Today's post is a quickie just to show you how I made the big flower on the card I made a few days ago.

1. Using the
Tonic Studios Multi Detail Heart punch punch, punch out 8 shapes. Then score each down the centre. I find my Tonic Studios Super Trimmer great for this.

2. Cut a circle and mark the centre with a dot. Fold each of the hearts in half.

3. Using Tonic Studios Funky Glue (only one the right side of each heart) stick the hearts to the circle as shown above.

4. Add a Classic Daisy punched shape and a mini Daisy to the centre.
MAKING A FRAME WITH THE VICTORIAN BORDER PUNCH

So many punches, so little time!! I love trying to use these punches in different ways and on this card I've used the Tonic Studios Victorian border punch again (you can tell this is a favourite..). This time I've made a little frame with it. It's really easy to make and only takes minutes. I've shown below how I did it but it's a lot easier than it looks.
The "flower" in the centre was made with the Tonic Studios Multi Detail Heart punch, Simplicity Geared Daisy punch and the mini Daisy punch.
Enjoy.

1. Measure depth of punch-15mm

2. Draw a line 15mm in from 2 sides of card.

3. With the back of the punch facing upwards, start punching right at the edge of the upright line.

4. Turn it over and carry on punching as normal

5. Punch 4 times and turn over, then start in the same way at the other corner.

6. Carry on punching as normal.

7. When you have punched 4 times, draw a line from corner to corner of the punched section.

8. Now draw a line 15mm outside each of these lines.

9.Cut the paper off along the outside lines.

10. Punch along the other 2 sides in the same way to create the frame.

I was having a little play with the new Victorian Border punch by Tonic Studios a couple of weeks ago and came up with some different things to do with it. This is the first one and I've made a card and little matching bag to show it off. The image is "Two Roses" - one of my digi images from A Passion for Stamps
I've chosen bold black stripes with contrasting Antique pink. The little flowers on the strip were made using Tonic Studios Petal Pairs and Petal Pairs Petites
Here's how I made the little strip.
(THIS WORKS WITH SOME OF THE OTHER PUNCHES IN THE RANGE TOO.THE STRIP WIDTH NEEDS TO BE SLIGHTLY DIFFERENT - I'LL BE SHOWING SOME MORE IN A DAY OR TWO)
(THIS WORKS WITH SOME OF THE OTHER PUNCHES IN THE RANGE TOO.THE STRIP WIDTH NEEDS TO BE SLIGHTLY DIFFERENT - I'LL BE SHOWING SOME MORE IN A DAY OR TWO)
1. Cut a strip of black card 3cm wide and as long as you need for your card.

2. Punch along one side with the Tonic Studios Victorian Border punch

3. Turn the strip over and line up as shown above. I've made a little mark directly above the dashed line on the punch so you can see it above the card.


4. Now line the punch up as normal and carry on punching along the card to the end.

5. The finished strip.

MAKING A WEDDING DRESS

 |
| 1. Cut a circle using the outside of the smallest Tonic Studios Circle Shape Mate |
 |
2. Punch 2 shapes side by side around the circle using the Tonic Studios Daisy Border punch. (in the same way as shown HERE) |
 |
| 3. Mark the centre of the top of the circle , then make 2 marks 1cm either side as above and cut from these two outside marks to each side of the Daisy punches |
 |
| 4. Make a long mark from the centre of the top and 2 marks 0.25 cm from the top on each side |
 |
| 5. Using the Tonic Studios Dotty Border punch and the marks as guidelines. punch on both sides of the centre to make the waist. |
 |
| 6. You can then use a thin embossing tool to draw lines on the dress from the waist to the side |
 |
| 6. Punch 2 Dotty Border shapes side by side |
 |
| 7. Mark and cut as shown in the photo above. This is the bodice. Stick this piece to the back of the skirt part. |
I added the little cutouts from the Daisy Border punch, some Stickles and a few gems to finish
USING OFF CUTS FROM PUNCHES

Today's cards show the Tonic Studios Multi Detail Butterfly, Daisy Border punch and Daisy Strip punch together with a few ideas to use up your leftover punched pieces.
The card on the left has a little two tone border down the left side which I made by interweaving the two strips which were left when I punched out the borders.


Another thing I love about the Daisy Strip /Border is that it is great for stitching. I've simply stitched through the holes with white embroidery thread to create a different look.
ROMAN BLIND AND WINDOW BOX

Today I have another little idea for the Tonic Studios Geared punch..Dotty Border and the Petal Pairs punches. It's very simple but effective.

I'll not bore you with the step by step details save to say that I used the Tonic Studios Super Trimmer to make the window frame, and hand cut the little window box. I've also used lots of Scrapbook Adhesives Foam Squares to add dimension.
Here's how to make the "Roman Blind"

1. Cut a piece of patterned paper 9cm x 11cm
and score at 4cm, 5cm,8cm and 9cm .

2. Punch the border and fold in "hill and valley" style as shown in the photo.
Stick to the inside of the window frame.
If anyone needs any further tips on this card - just leave me a comment.

I took the card on the right along with me to NEC last week and got so many people asking how I made it that I said I would add the details here and on Blog Tonic when I got home, so here goes.....

1. Start with a 15cm square card blank and mark the centre of the top.Centre the smallest Tonic Studios Oval Shape Maker to create a "neck" and cut using the cutter on the inside of the oval

2. Cut 2 triangles from patterned paper. One with sides measuring 15cm, 9.5 cm , 9.5cm; and the other measuring 10cm, 7cm , 7cm.

3.Set the smaller triangle face down on the same grid and mark both sides of neck edge.Place it on top of the larger triangle and lay the oval inside edge exactly on top of the marks and cut through the two pieces of paper.


5.You now have these two pieces.

6. Stick the larger piece down first with the collar on top using Funky Stick glue and doodle some faux stitching

7.Cut 2 pieces of plain card 15cm x 7cm. Mark 1cm from the side edge and 4.5cm from the top edge and cut this piece off both pieces. Emboss both pieces with Cuttlebug Argyle embossing folder and stick to each side of card(igan!)

8. Cut some pieces of card now;
20cm x 3cm Collar
4.5cm x 4cm (x2) Pockets
4.5cm x 2cm (x2) Pocket trim
10cm x 2cm Button edge

9. Using the Tonic Studios Dotty border punch. the embossing folder and crimper,
prepare the pieces as shown in the photo and stick down on the card in the appropriate places
10. I like to stick the collar down using the Funky Tape Runner along the top edge and the 3D foam squares at the bottom for a more dimensional look.


Add buttons, faux stitching and that's it!
Enjoy!
Enjoy!


1. It all started innocently enough - I printed off my Cheeky Parrot digi image, coloured it with Promarkers and decided to cut it out with my little Tonic Studios scissors. Then, as I looked at it I had the idea of making lots of tropical looking flowers and creating a "jungle" effect! Just as well, then that I kept the actual card white and didn't add any patterned paper!

2. Next, I decided to use my new Tonic Studios Shape Mate Starter Pack with the Oval shapes to create an aperture in the card front, so I used the smallest oval and cut around the outside.

3. I cut another piece of card to fit inside the front ie the same height but 1cm wider to allow for gluing and stuck it to the inside.


4. This time I cut an oval on the 2nd "page"to fit exactly inside the first oval but using the inside of the Shape Mate Oval template.

5. To make the "Tropical" leaves, I used the Tonic Studio Classic Heart punch, Craft Tacky Glue, turquoise card, a little green wire and a paper crimper.
 6 .I added a little Craft Tacky Glue to the middle if the heart then folded it in half with the wire in the centre.
Pinch the heart tightly in the centre over the wire to keep it in place.
 7. I fed the "leaf" through the crimper at an angle to create veins.
 8. After a lot of punching flowers using the fabulous Petal Pairs, mini Daisy, Multi Detail Flower,
mini Snowflake. mini Flower head and mini Butterfly, I added some pen detail and a gem before adding the finished flowers to the different layers of the card.


A bit different for me but I hope you like it!
USING A BORDER PUNCH TO CREATE A CIRCLE
Pinch the heart tightly in the centre over the wire to keep it in place.


A bit different for me but I hope you like it!

Another little tip for using the Tonic Studios Daisy Simplicity Geared Punch is to create a doily shape with it. This can then be used on its own or to complement the border pattern as in the wedding card above.
 |
| 1. Cut a circle 11cm in diameter. |
 |
| 2. Place circle into punch as shown above. |
 |
| 3.Turn punch over so that you can see it form underneath. Start your next punch exactly on top of the last hole on the left of the previous punch. This is a lot easier than it sounds -you can see the hole clearly marked by the arrow. |
 | ||||||||||||||||||||||||||||||||
4. Continue right round in this way until the last pattern. This time you just have to line up both sides as shown above.It fits exactly and you can even "feel" the punch resting in the correct place. |

After I posted the photo of the Poinsettia card yesterday, I got several requests from other crafters asking how I had created the punched effect around the image so I decided to make a similar card and show how I did it.
The image I've used this time is Holly from A Passion for Stamps, coloured with Promarkers and highlighted with Glossy Accents.
 | ||
| 1. Cut a square of card/paper to fit as a mat on your card front,then cut a circle 15cm from the centre of this. |
 |
| 2. Insert card /paper into the Mini Holly punch, so that the punch rests on the edge of the circle |
 | |||
| 3. Line up punch as shown and repeat till the circle is filled.It's as simple as that!! |
On this card I've embellished the corners with the inside part of the Tonic Studios Snowflake punch
to which I've added some glitter
to which I've added some glitter
MAKING A BUTTERFLY CIRCLE USING TONIC STUDIOS BUTTERFLY STRIP PUNCH

I've had another idea for using the Tonic Studios Butterfly Strip punch ....actually I've used the same idea to create doilies etc with some of the other new border punches and I'll show you those soon too.
The image used on the card is Butterfly 1 from my digi collection at A Passion for Stamps.
This "strip" punch creates such a beautiful delicate pattern that I thought it would be lovely used as the centrepiece so I have chosen contrasting colours for the card and matted the butterfly circle on white for impact.
The butterfly border strip looks great used as a straight border but I wanted to share this circle idea with you.
 |
| 1. You'll need a circle of cardstock measuring 11.5cm diameter |
 |
| 2. Place the circle into the punch as shown in the photo above. |
 |
| 3. Turn the punch and card over together and line up the punch with the edge of the last punched shape on the top left corner leaving about 1mm of card showing. IT'S IMPORTANT TO TURN THE CARD AND PAPER TOGETHER TO KEEP THE PATTERN CORRECT!! |


 | ||||
| 4. Continue right round the circle in this way |
 |
| 5. The last piece to be punched will have a "space" at the top on both sides - this is correct for lining up. |
 |
| 6. This is the shape you'll be left with and you can use it like this or snip the butterfly circle from the scallops as I have done for my card. |

 |
| 7. I then added the Accent corner wings to my Accents Butterfly punch to decorate the corners of my background. |
 |
8. I added some contrasting cardstock behind the butterflies . |
MAKING A SPOOL USING A FLOWERPOT PUNCH

1. Woodware flower pot punch or similar

2. Punch out two shapes

3. Adhere these together as above

4. Wrap embroidery thread around the "spool"

Challenges
Alphabet Challenge ...P for Pretty Pastels
USING A TONIC STUDIOS BORDER PUNCH SYSTEM TO MAKE A "COLLAR"

Tools needed
This is fairly self explanatory but if anyone wants more detail, feel free to let me know

USING A MARTHA STEWART STRING LACE (PUNCH AROUND THE PAGE) PUNCH TO MAKE A BIRDCAGE

I bought a Martha Stewart "String Lace" punch around the page set in Sir Stampalot a couple of weeks ago and got to thinking....
Firstly I punched a "corner "(the top of the cage) and then made a punched line down each side from the top. This left a rather blank looking part in the middle so I made a "ribbon" from the same punch and adhered it to the "inside" of the cage.
I then hung the little cage from a Marianne Creatables branch from which I had removed the bird.
Next, I coloured the bird with Promarkers (Blush and Dusky Pink) and put him on the cage.
To add a little more interest I printed out my Two Roses digi image from A Passion for Stamps and made them really small before colouring them to match the bird. I know it's not perfect...but I like it!!

1. Punch a corner

2. Measure1.5cm from edge of punched corner on each side and mark.

3. Cut 2 parallel lines from the marks.

4. Punch both sides from as close to the corner punch as possible, then cut across the bottom leaving a little "ledge"

5. Cut a 2.5cm strip of paper and make the "ribbon" part for the inside of cage.

USING THE XCUT SCALLOP BORDER PUNCH TO MAKE A FRAME


1. Measure the depth of the punched area on scrap paper (it's 12mm for this punch)

2. Mark this distance along 2 sides of a piece of cardstock as above.

3. Holding the punch upside down punch the card from where the two lines meet in the corner.

4. Now punch from the same corner in the opposite direction.

5. This is the result. you can now keep a square or make a rectangle by punching along another length like the pic below


These are the pieces you are left with and all of them can be used..even the scallop can be used for part of the butterfly as seen in the card below.

USING PUNCHES TO MAKE A FLOWER

1.This is what you'll need (or similar) to get started

2. Punch out 3 large white flowers,
1 large green flower
3 medium kraft flowers
2 small kraft flowers

3.Cut down the centre of petals on white flowers following the spiral line and emboss a line down the centre of the green flower as shown.

4. Add glitter glue to all the edges

5. Using a large ball embossing tool, draw the petals into the centre starting at the outside edge.

6. Starting with the green "flower" as the base, add a dab of glue.

7. Now add a white flower with the petals pointing in the same direction as the base.
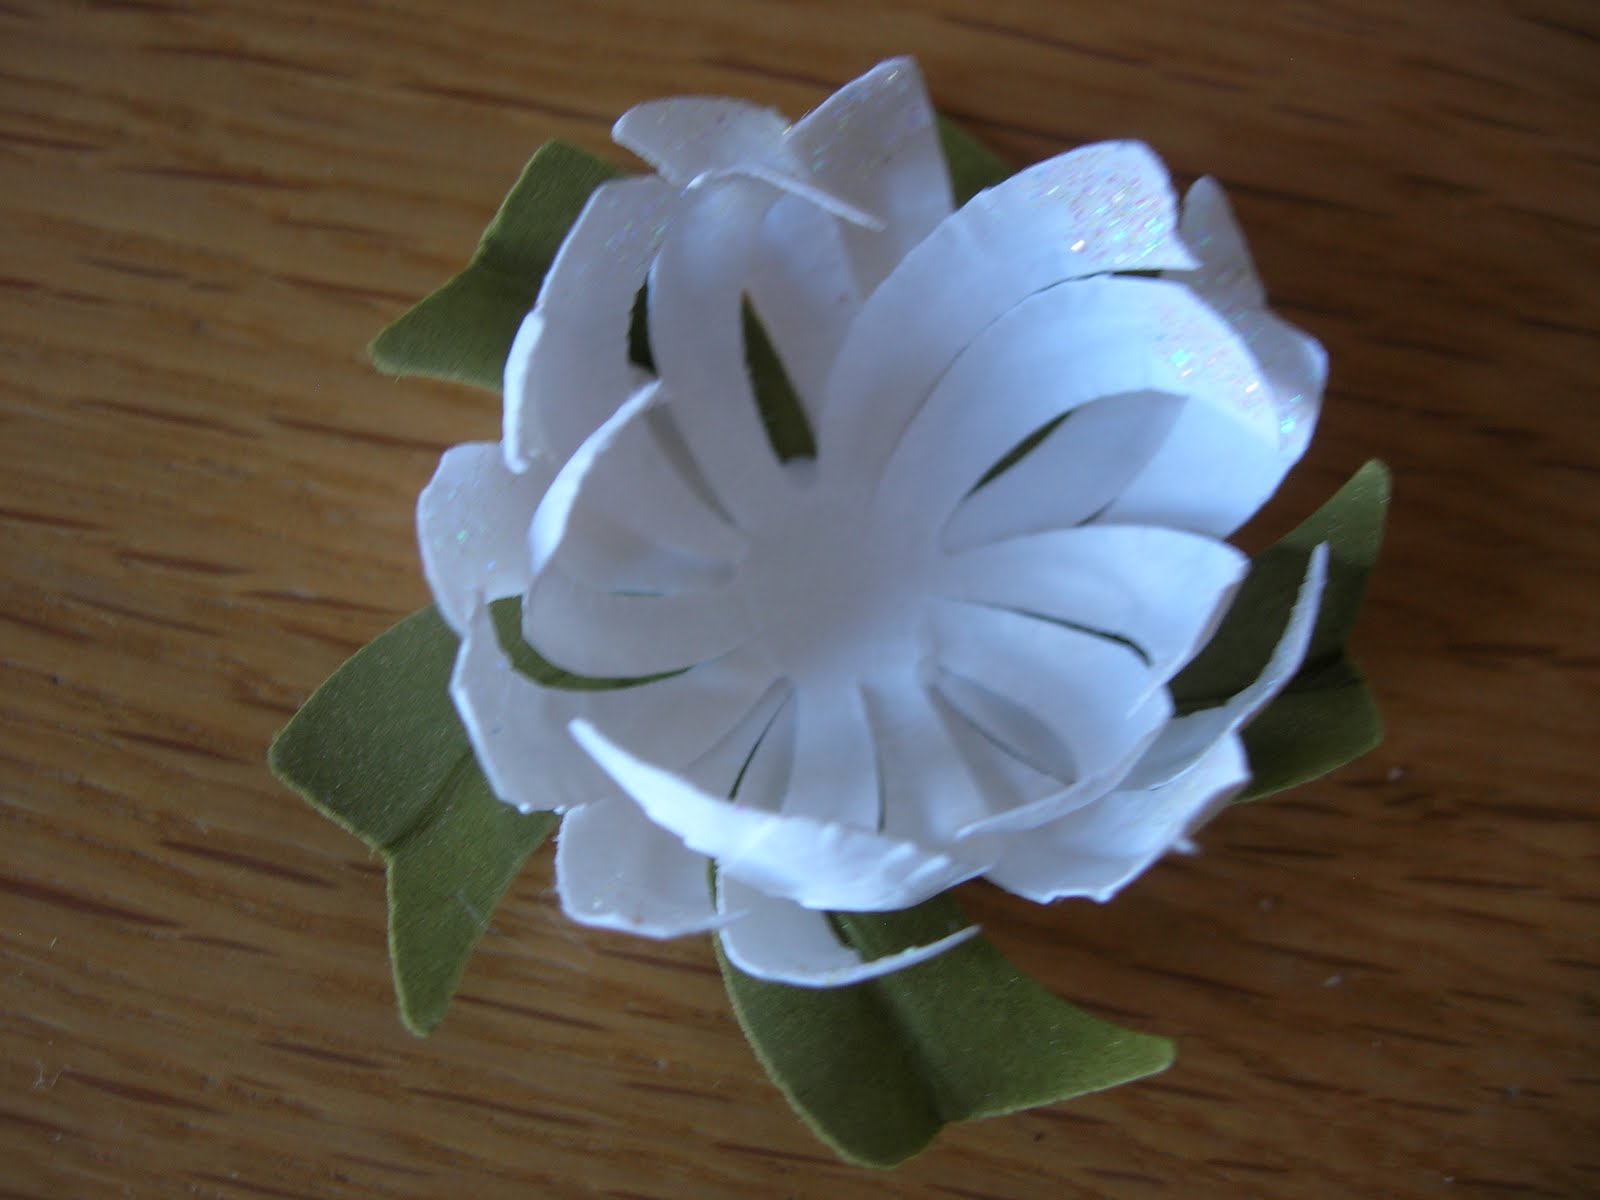
8. Add the next white flower but this time with the petals pointing in the opposite direction as the last one. Then add the 3rd flower with the petals pointing the same way as the first one.

9. Emboss all the medium and small flowers in the same way as the white ones ie drawing the petals in to the centre.
Now you are ready to add a pearl, gem glitter etc to the centre.

USING A WOODWARE SWIRL PUNCH TO MAKE A FLOURISH
The finished shape looks great put together to make a frame as well!
 | |||||
| 1. Punch out 4 shapes |
 | |
| 2. Overlap 2 shapes as shown |
 |
| 3. Stick together with glue pen |
 |
| 4. It can be used like this or you can add another 2 swirls to make it bigger |
 | |
| 5. Bigger shape |
 |
| 6. A card made with the finished shapes. |
USING A WOODWARE SWIRL PUNCH TO MAKE WAVE BORDER
USING A WOODWARE SWIRL PUNCH TO MAKE TINY ROSES
 | ||
| 1. Cut a strip of blue paper |
 |
| 2. Punch a row of swirls with even space between |
 |
| 3. Using sharp scissors, cut at an angle from the top of one shape to the bottom of the next |
 |
4. Finished wave section |
USING A WOODWARE SWIRL PUNCH TO MAKE TINY ROSES
 |
1. Punch pink swirl shape  |
 |
| 4. Finished roses on card |
USING A MARTHA STEWART DOILY BORDER PUNCH AS A CORNER PUNCH;


3 Close up showing how to align the holes in the punch with the edge of the paper

4 The fiinshed punched corner

5 Used on a card

USING A MARTHA STEWART DOILY BORDER PUNCH TO CREATE A LACE EFFECT;
1. Cut a strip of paper for the lace. The one I'm using here is 4.5cm wide

2. Line up the paper with the edge of the cutting part of the punch

3. Punch along to the end of the strip and turn the strip over

4. Line up the opposite end of the strip with the cutting edge and repeat

5. The finished strip of "lace"

6. A card made with a similar lace strip

USING A MARTHA STEWART DOILY BORDER PUNCH TO MAKE A ROSETTE
1. Cut a strip of Cored'inations A4 paper 4.5 cm wide and punch the edge

2. Run this through a Cuttlbug with an embossing folder and then sand the pattern ( I use a foot dry skin remover)

3.Fold in a concertina style

4. Stick edges together with double sided tape and then stick this onto a circle of card using a hot glue gun

5. Add image

6. Finished card

USING A MARTHA STEWART DOILY BORDER PUNCH AND SCALLOP CIRCLES
TO MAKE A WEDDING DRESS
- Cut a large scallop circle shape and mark a single scallop at the top. Measure 14 scallops either side of this leaving 8 at the bottom and cut.

2. Snip approx 1cm off the top single scallop

3. Place the narrow end (ie the waist of dress) into punch as shown to create a V waist shape and punch

4. Punch a strip with the doily punch and cut out a section as shown below

5. Come in 2 scallops from the right hand side at the bottom of "dress" and make a slit 2cm long. Mark from edge of scallops to top of slit and fold back.

6. Attach the top part of dress to the skirt and add another piece of border punched strip behind folded part at the bottom.
Mark a point on the "hip" as shown and draw freehand curved lines with a fine embossing tool from this point down the side.


Now you can decorate whatever way you like. I've added glitter glue, diamantes and a tiny bow but the possibilities are endless eg lace. embossing etc
