You may remember that I gave you a little look at the new Spring Meadow Trend from Tonic 2 weeks ago. I only had the card at that stage so now I have the full Trend and I'm showing you everything in it today :)
If you've already seen the contents you can skip right on to 9 mins 53 secs to see how I use lots of different products from it to make 2 different cards.
This gives you lots of scope for using all the dies and stamp sets which you might already have!
You can see my video here -
(and scroll on down to see LOTS of photos!
In this video I have used the following (affiliate links)
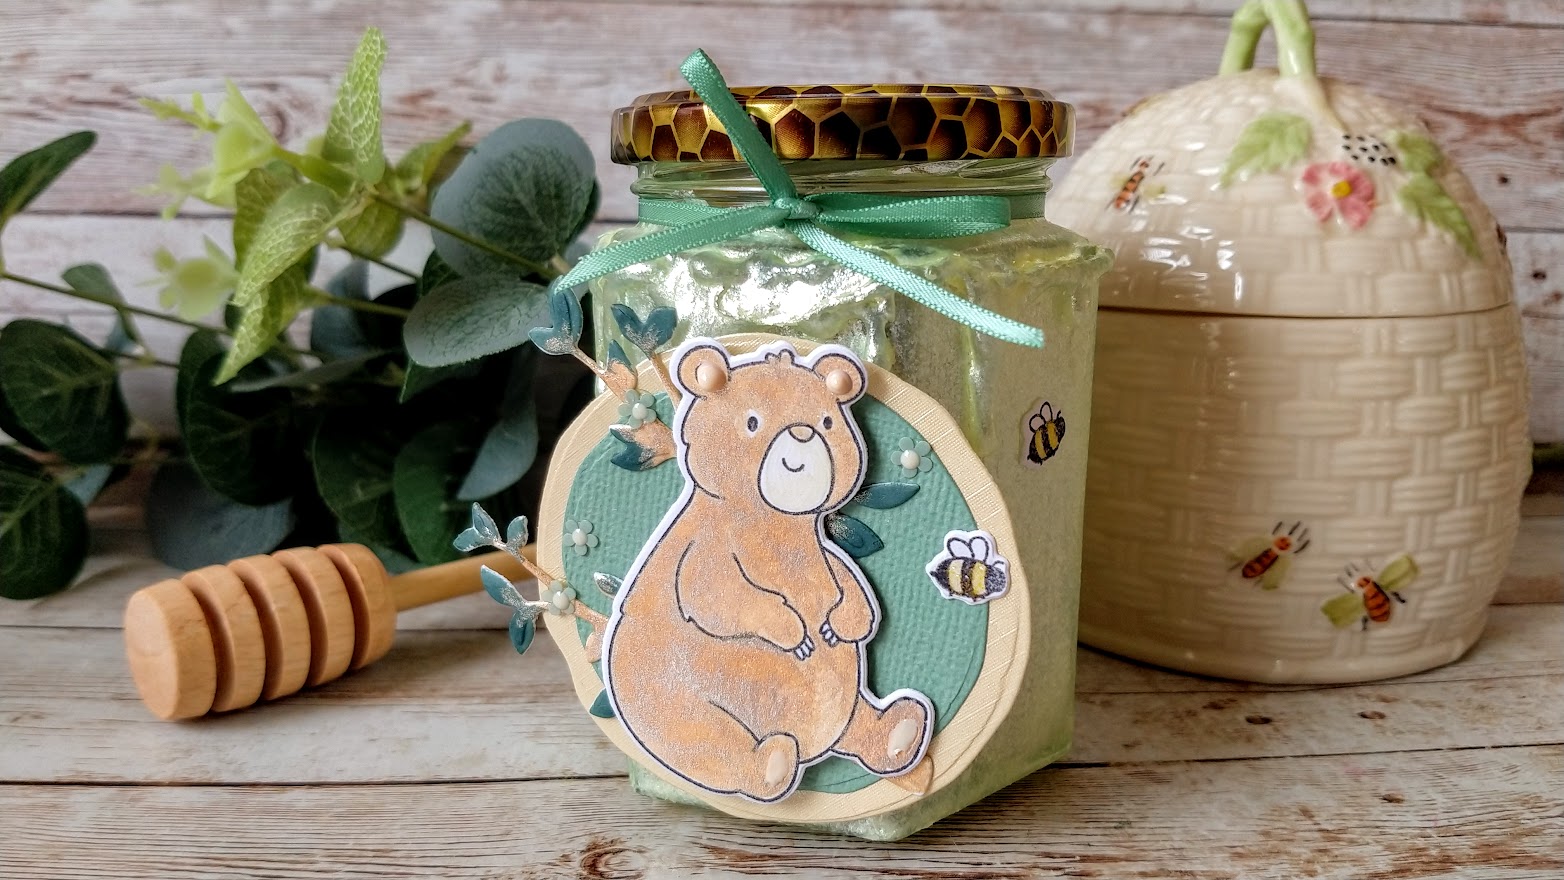
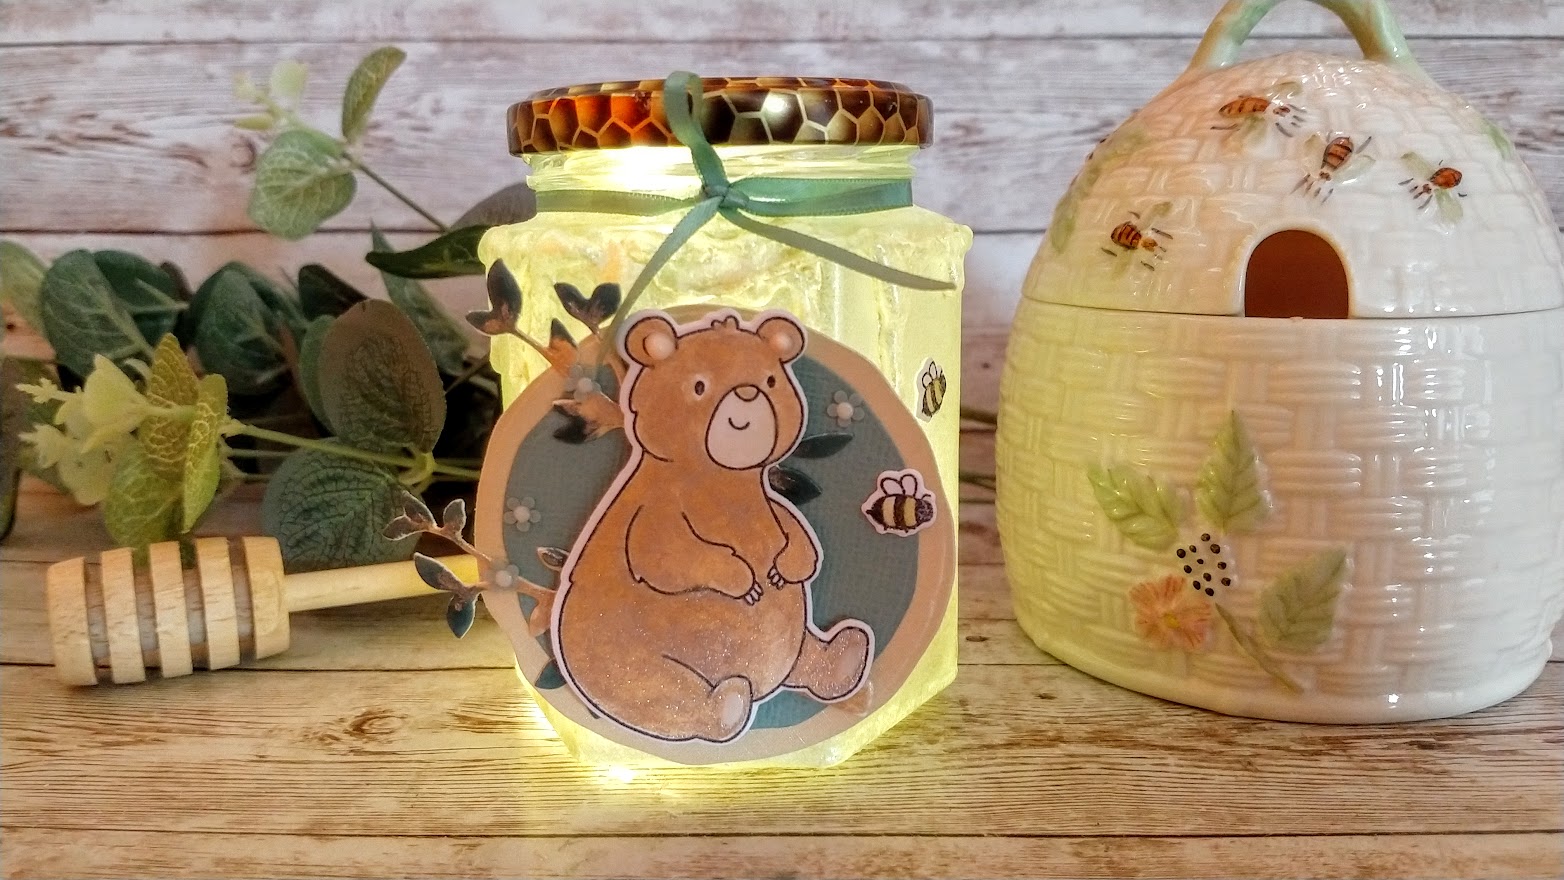
This is another card in my Card Shapes Playlist where I show you some ideas of how to change the look of an ordinary card to give it a little "something extra". This fold actually came about by accident a couple of years ago as I was preparing the pieces for a demo card and cut it in half by mistake! The original card was a 5x7 blank but this time I've made a 6x6 card. You can use any dies, papers, stamps etc that you have and don't need anything special at all. I hope you enjoy this and please help me to grow my channel by leaving a little comment in the section below this description.
As I said you can use whatever you like but if you're interested, I have used the Sweet Pea digi image - https://ruthhamiltondesign.com/produc...
from my website "Ruth Hamilton Design" - https://ruthhamiltondesign.com/ and coloured it with alcohol markers.
Thanks so much for looking :) If you enjoy the video please don't forget to "like" it and subscribe to my channel :)
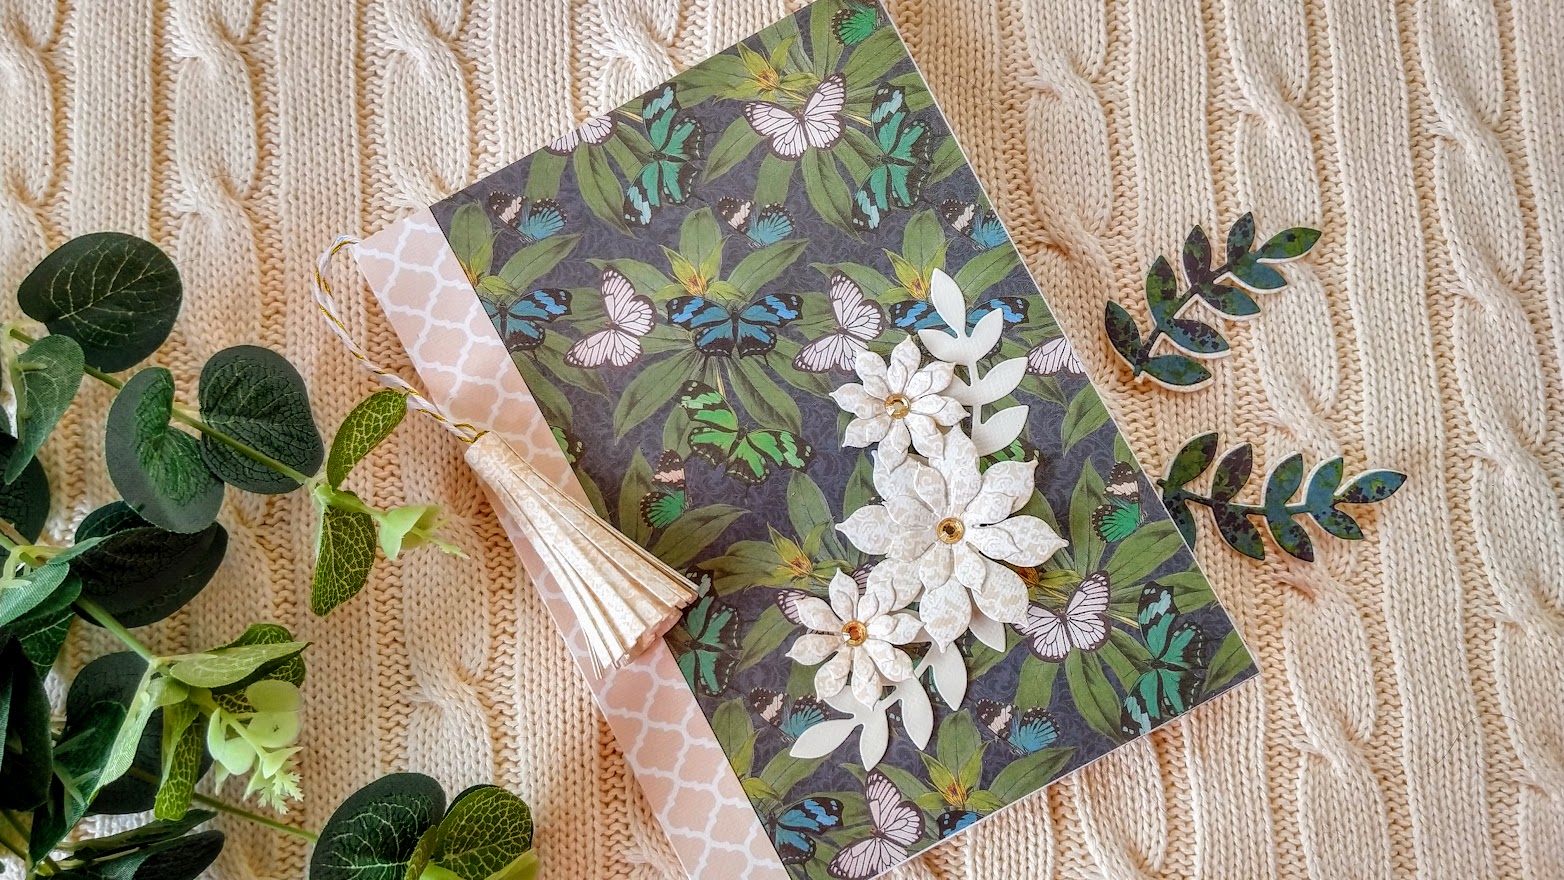
I've just posted a video showing how to make an envelope album. I'm sure lots of you have plenty of spare envelopes!
You don't need any special dies, stamps etc, just use whatever you already have to decorate. I've used envelopes from 5x7 cards for this one but I'll be back at another stage with different sizes and shapes
This is my Guest DT card for the Allsorts Challenge Blog where the challenge this week is "Birthday"
I've made a DL card using the Hydrangea digi image from my website - Ruth Hamilton Design, printed it out 3 times and coloured it with alcohol markers. Then I overlapped them and glued them to my card and die cut. I've made a lot of pink cards lately and I'm beginning ti like it! lol
You can, of course, use the kit to
make cards and you can see how I made the two beautiful cards below in my video
here –
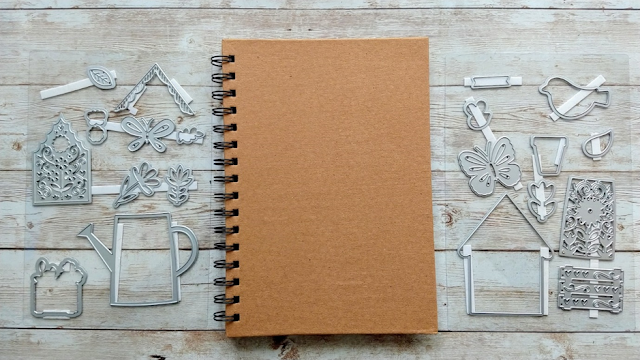
These are the contents of the kit
To decorate the front and back covers
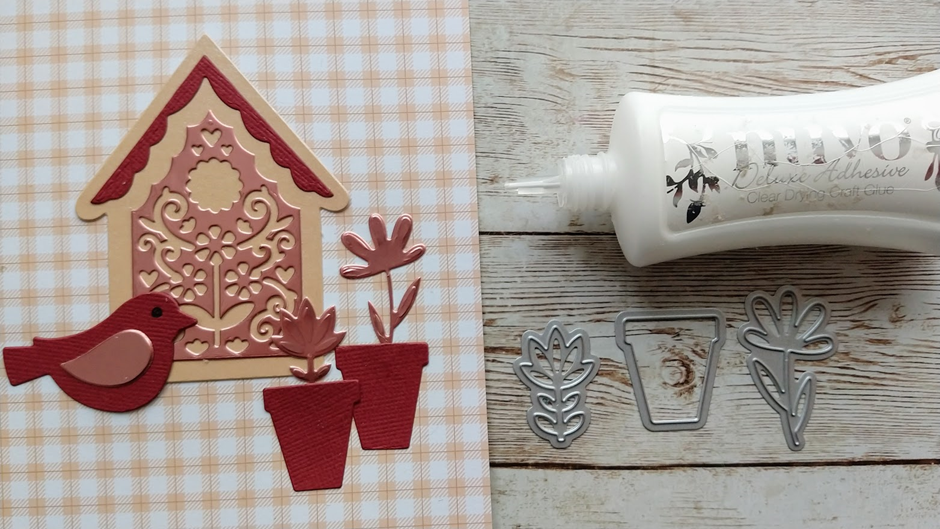
of your A5 notebook you will need the dies and papers from the kit along with Nuvo
Deluxe Adhesive and some Craft Perfect Jute Twine.
Let's Get Started!
1. Cut 2 pieces of patterned paper
measuring 13.5cm x 21cm.
NB. I highly recommend not gluing these
to your notebook until you have completely decorated them and are happy with
them!
1. Cut 2 pieces of patterned paper
measuring 13.5cm x 21cm.
NB. I highly recommend not gluing these
to your notebook until you have completely decorated them and are happy with
them!
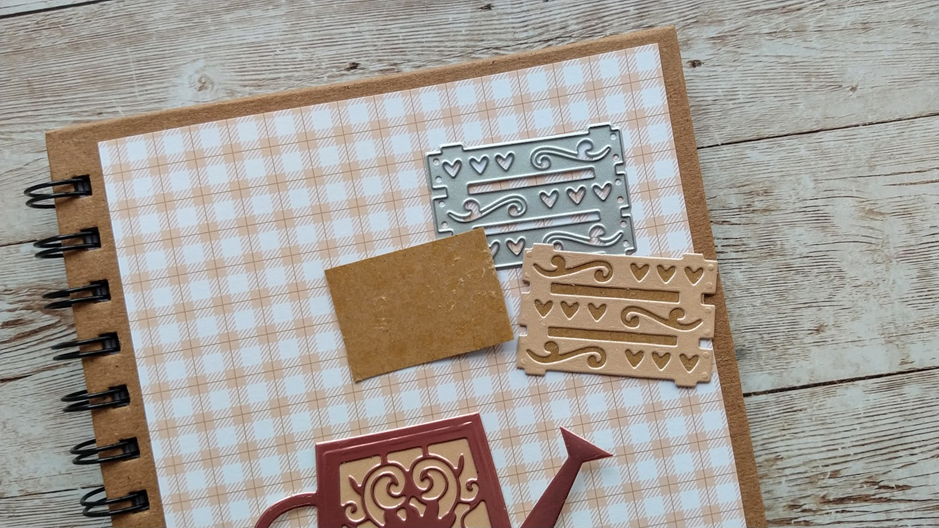
3. Snip off the spout and handle from
the cream watering can and glue behind the patterned die cut.
4. Die cut the planter and cut a
rectangle of card to fit behind it. Glue together.
5. Glue a small square of card to the
back of the planter on the right side. This is to help keep the planter level but
not add dimension.
6. Glue the watering can to the paper
and then add the planter as shown.
7. Die cut the bird from Coffee Cream
card and 2 wings from Maroon card. Glue the wings in place and add a black dot
for the eye. Glue the bird to the top of the watering can.
8. Die cut 2 Baroque Rose butterflies
and glue above the bird.
9. Die cut 3 flowers with stems from
Coffee Cream card and the same again from Maroon card. Snip off the Maroon
flowers and glue on top of the Coffee Cream flowers.
10. Glue these to the bottom left of
the watering can.
11. Die cut a selection of maroon and
cream flowers and leaves. You can use the leftovers on the back of the notebook
or another project.
12. Glue the flowers and leaves to the
front of the notebook, around the planter and watering can. Tie a length of jute
twine to the top of the spiral binding.
Back Cover -
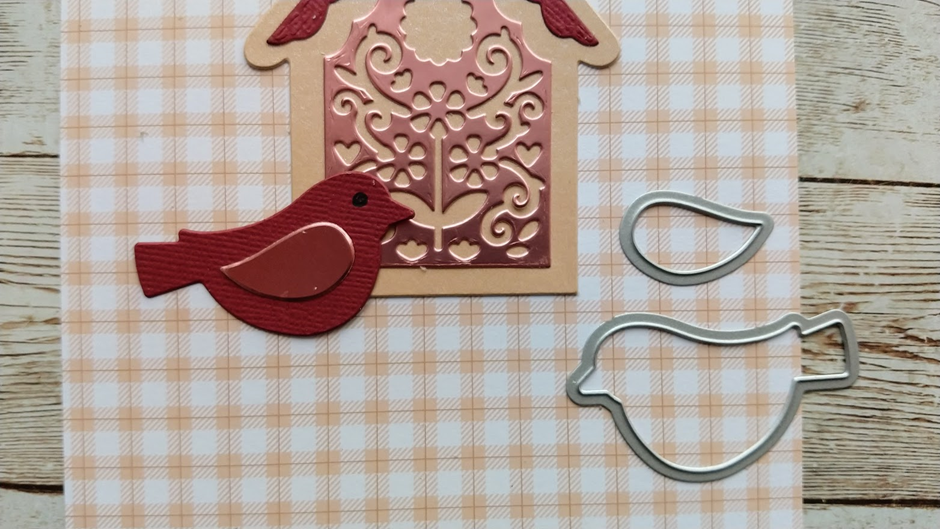
13. Die cut the birdhouse from Coffee
Cream card and the patterned panel from Baroque Rose card. Die cut the roof
part from Maroon card. Glue these in place and glue to the centre of the page.
14. Die cut the bird from maroon card
and the wing from Baroque card and glue onto the bottom left of the birdhouse.
Add a black dot for the eye.
15. Die cut 2 flower pots and 2
flowers with stems. Glue to the right of the birdhouse.
16. Die cut several flowers and
leaves. You can use the left overs for another project.
17.
Glue the flowers and leaves around the birdhouse and add 3 leaves to each top
corner of the notebook.