
Craft Kit 76 Bunny & Egg

This is such a happy kit! Everything from the colours of the
card to the dies and stamps just makes you want to smile.
You will be able to make up an egg shape which you can then
adapt to create a bunny and/or chick.
I’m absolutely sure that you’ll also let your imagination take
over and create all sorts of other animals or creatures. That’s the beauty of a kit like this! The
photos on the leaflet are just the starting point…
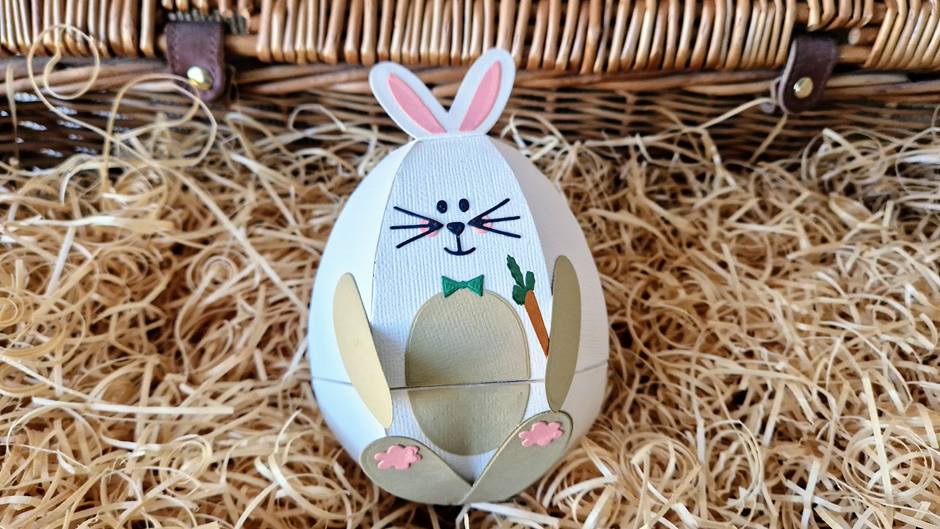
In this step by step, I’ll be showing you how to make the
basic egg shape and then use the cute little dies to turn it into a bunny. I
have used the ears provided (what a strange phrase!) but I think you could also
use the arms/legs as ears to create a lop-eared bunny. Enjoy 😊

These are some of the other things you will be able to make with the contents of the kit as you can see in my video
Let’s get started!

1.
Using the Ivory card, die cut 4 Hexagonal Base
pieces.

2.
Die cut Easter Egg Top x 6
Easter Egg Base x 6
Large Hexagon x 1
Medium Hexagon x 1
Closure Tab x 2 (optional) I used magnets
instead
Easter Egg Hinge x 1

3.
Burnish the top and bottom score fold lines on
the Easter Egg Top die cuts crisply. This is important to make the finished egg
come together neatly in the centre. Gently shape these using a marker or
something round (to prevent creases).

4.
Adhere the top tabs of these pieces to the Medium
Hexagon.

5.
The glue all the semi circle tabs on the sides
to each adjoining die cut. The little square tabs do not need to be glued in
place.

6.
Glue a Hexagonal Base under the glue tabs on the
rim.

7.
Repeat this process using the Easter Egg base
dies and the Large Hexagon.

8.
Glue the hinge in place.

9.
If you’re using the Closure tabs, you can glue
them in place now. Adhere the 2
remaining Hexagon Bases on top to cover all the glue tabs.

10.
If you’re using small magnet to close the egg,
you can adhere one under each side of the rim as shown. Die cut another Medium
and Large Hexagon and glue in place to cover the glue tabs.

11.
Die cut 2 sets of bunny ears and a pair of ear “inners”.
Remove the tabs from one set of ears and glue these to the back of the full
set. Glue the inners in place. Fold the glue tab back and glue the ears to the head.
You can cover the glue tab with another matching hexagon.

12.
Die cut the pieces shown to create the face, arms,
legs, tail etc. I have cut double amounts of arms and legs to glue together to
strengthen these parts.

13.
Glue in place as shown.

14.
You can use the little tail piece (in pink) to
add pads onto the feet. Cover the join with an extra die cut.

15.
Glue the little carrot onto the “hand”.

16.
If you wish to reinforce or strengthen the bunny
body, go ahead and add plain die cuts inside the body.
Love this Bunny xx
ReplyDelete