Friday, 16 August 2013

Quick cards


Quite often I get asked to make Get Well or Sympathy cards which are not too fussy or fancy but I never post pictures of them here. I am in the middle of preparing all the bits and bobs for a batch at the moment and I just thought I'd show you the first three completed, for a change...
The first thing you'll probably notice is that I've used the new Tonic Studios Verso dies  - if you want a quick but elegant looking card, you'll want these! You can create a quick but effective card which looks like it has been laser-cut. 
On the first card I have used the Delicate Lattice Verso die with the Antique Frame die on top.
The image is Rhodendron - one of my own digi images from A Passion for Stamps which I've coloured with Promarkers and cut out. The butterflies are Classic Butterfly which I have double layered and the Multi Detail Butterfly at the top.


On this one I've used the Gothic Square Verso die which I have cut out and adhered to the card with the Antique Frame die on top again. The image this time is a Tonic Studios stamp..Fuchsias (from a set)


Lastly, I've cut out the Delicate Lattice Verso die shape on self adhesive cork. I  love this stuff and it looks great with the shells. The next layer is the Vintage Frame and I've coloured another of my own digi images - Sea Shells, again from A Passion for Stamps.
The white card is felt embossed and the two top frames are cut from kraft card - both  from Papermill Direct.
Plainer than usual, but I hope you'll like them for their simplicity :)

Tuesday, 13 August 2013

Having a play


I know this is real beginners' stuff but I've been trying out some ways to combine a lot of things that I want to use together...
I'm still in the early stages of "Silhouetting" but I'm so impressed with how smoothly it cuts out the Papermill card which I use all the time. One of the items which is in the library when you first get your Silhouette is this little purse. Obviously you can make it whatever size you like but I have sized it so that it fits onto an A4 sheet of card. I always like my flowers - and by that I mean my Punch and Stamp flowers by Tonic Studios - and the card which is left on the cutting mat after the purse has been cut out can be used to punch out lots and lots of matching petals for flowers to decorate the bags with. This size would be great for wedding favours..
I've used Rich Cream hammered, Raspberry Pink and Teal smooth card and the Rose, Pansy, Camelia, Gardenia Punch and Stamp set.


Monday, 12 August 2013

Lupins


I've made another card with the Lupins digi image which I drew and added to A Passion for Stamps this week. This time I've coloured them purple and yellow and cut the image out with the Delicate Lattice Verso die by Tonic Studios. I've used the matching border punch along the bottom of the card and added some lilac Branch die cuts at each side. 
The image has been printed onto the new super smooth 300 gsm white card from Papermill and the lovely purple background is Dark Violet smooth card, also from Papermill.

Friday, 9 August 2013

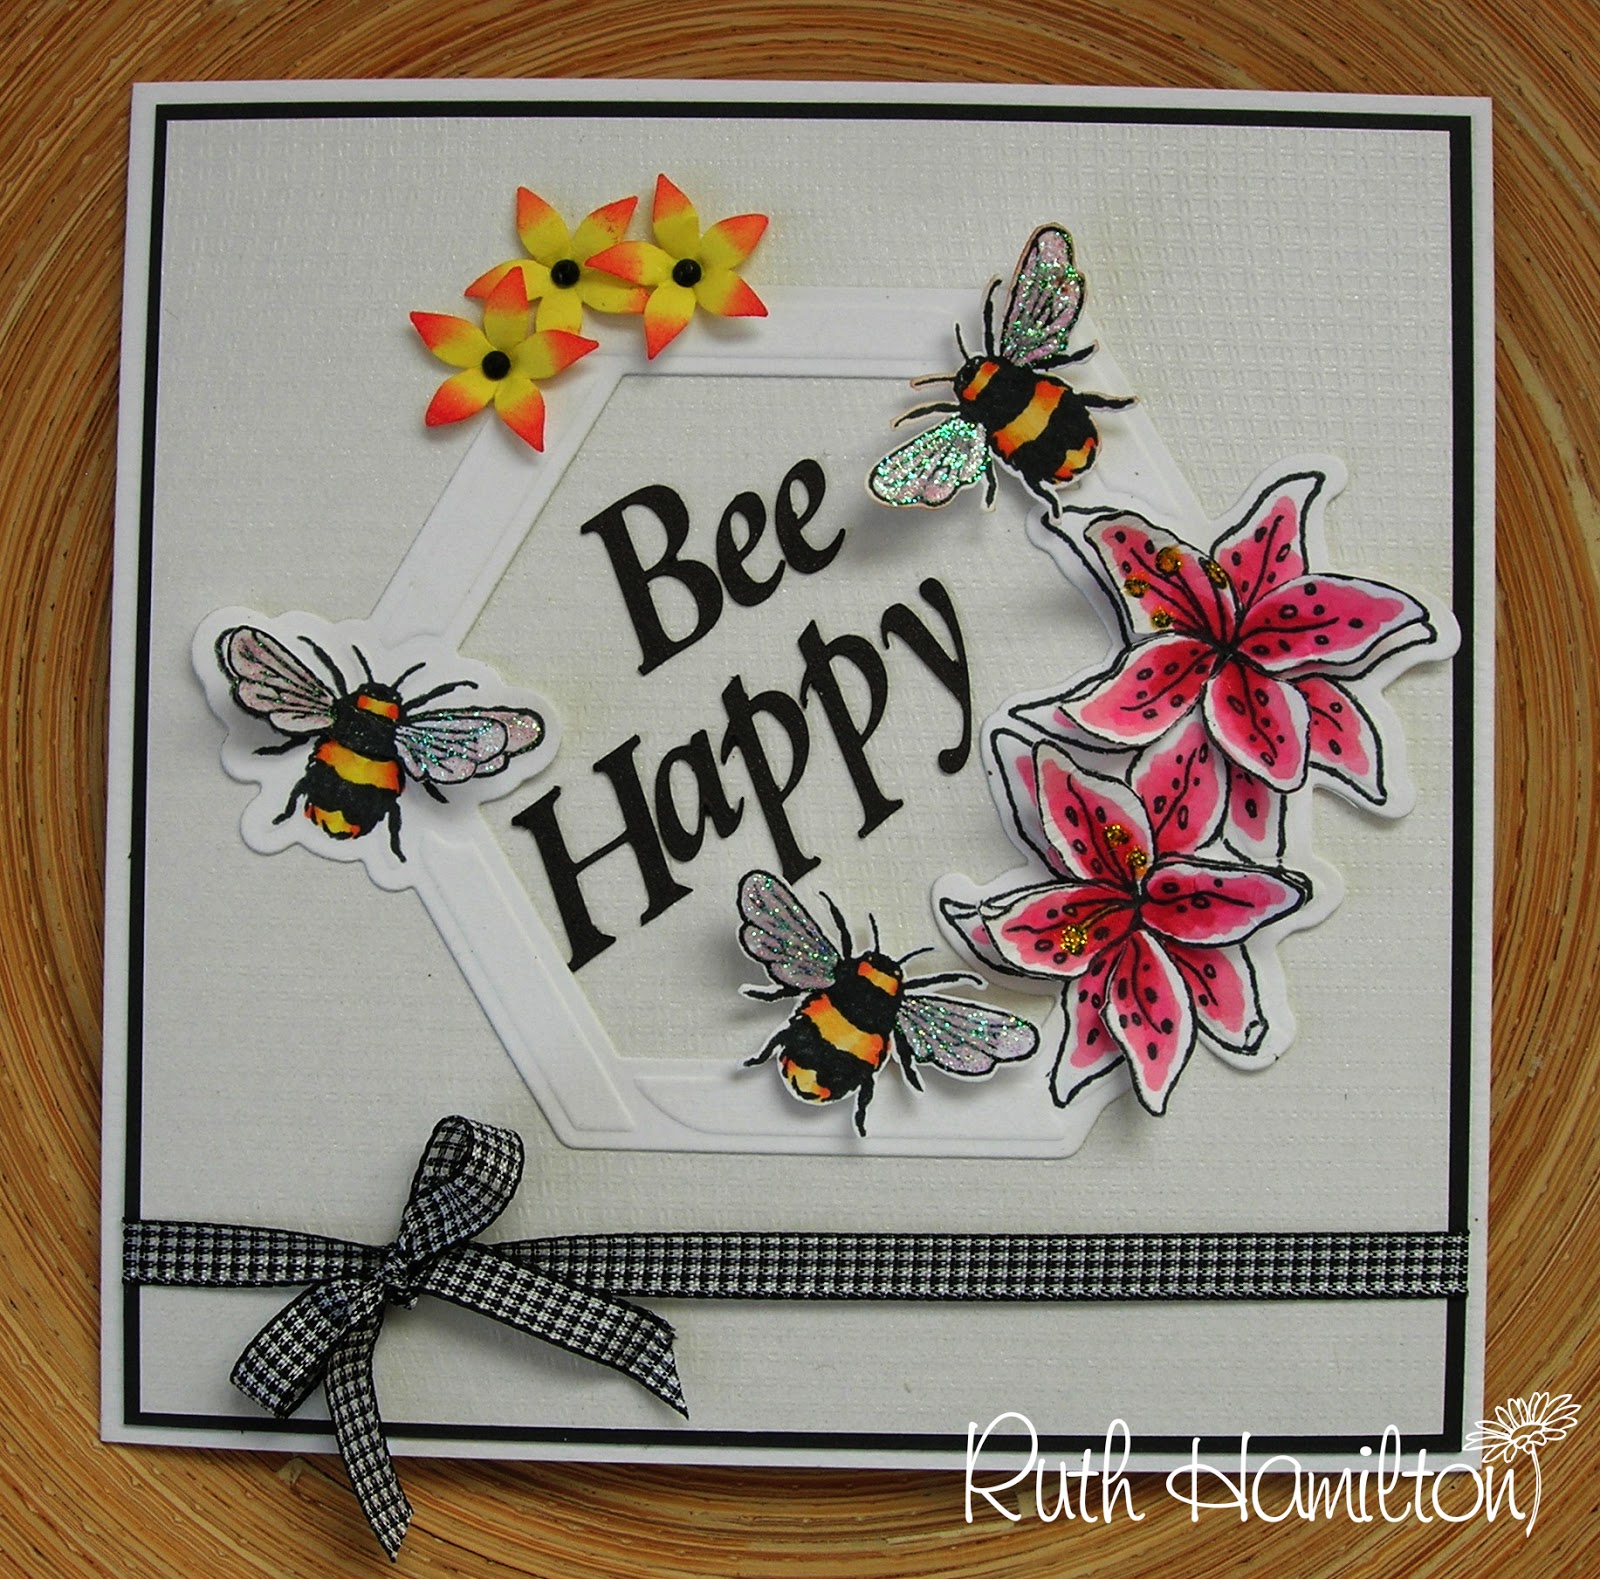
Bee Happy..


Today's card is primarily to show this week's special offer at Papermill - it's beautiful textured, pearlised natural white card (200gsm) which you can see HERE - You can get 50 A4 sheets for £3.00 !!

As some of you know I got a Silhouette Cameo over a week ago and have been trying to get a bit of practice before I would post a card using it...well, I've so many things on this week that I'm almost dizzy - no, I quite literally am dizzy! However, the beauty of this machine is that I was able just to create and cut this font at the touch of a button. The machine uses all the different fonts you have downloaded to your computer so the options are endless. Of course I'm only learning but I've already got lots of other things cut out and will be showing you what I've done very soon.

It's actually another wonderful benefit to being on the Papermill Design Team - their card works like a dream in the Silhouette.
I've used the Tonic Studios Lily Window die with 2 extra bees and added some tiny flowers at the top too.
See you soon :)

Tuesday, 6 August 2013

Colouring with Promarkers onto Papermill smooth white card


As it's my turn to do the blog post for Papermill I thought I'd show you how well the new 300gsm super smooth white card works with Promarkers.
The image is "Lupins" which I drew a while ago and have now added to A Passion for Stamps digi collection. I used the Diamond Swing Verso die by Tonic Studios and the embossing folder is  Lattice by Creative Expressions.
Ok, here goes...there are lots of photos - you have been warned :)


1. Print your image onto the card and die cut (you can die cut later but I like to do it at this stage)


2. These are the colours of Promarkers I've chosen to colour the Lupins with.


3. Colour the stems with Forest Green.


4. Add Holly to the centre of the leaf and to the other bits of stem where you'd see a shadow.


5. Go over all the green area again with the Forest Green to blend the light and dark together.

6. Colour one lupin with the Watermelon Flexmarker with a little Forest green at the tip.

7. Add Carmine to the base of the petals and to the parts of the flower which are in behind.


8. Now add a tiny dab of Ruby to the base of the petals and also to the parts in the background of the flower.

9. Go over the whole flower again with the Watermelon to blend the different shades together .

10. Colour the 2nd lupin with the Lilac Promarker and use Forest Green on the tip.

11. Add Amethyst to the base of the petals and to the parts which are behind.

12. Go over the whole flower again with the Lilac to blend the shades together.

Step back and have another look - it's well worth the effort to give it a dimensional look :)

Quite often I leave the image at this stage but I have added an outline of Teagreen Promarker round the Lupins to add depth and also a couple of highlights with a white gel pen on the actual photo to show the difference.

New Tonic Studios Christmas dies...


Good morning..This beautiful set of Christmas dies by Tonic will be released on Create and Craft at 9.00pm this evening..don't forget to keep an eye on Blog Tonic for more previews throughout the day :)

I have used the Indulgence Elegant Vine Tag oval die -  with the Candle tag die. I've also used the Gothic border punch and the Clematis, Lily, Poinsettia Punch and Stamp set.

Monday, 5 August 2013

Sneak peak at new Tonic dies


Just to whet your appetite....here are some of the new Tonic Studios dies which will be on Pick of the Day on Create and Craft tomorrow. I've used some of them to make a Christmas box. I've used 4 different tag dies on the sides and a different on the lid.


and the lid...

I took all the step by step photos as I made this so I'll share them with you in a day or two when you've actually got the dies :)


Sunday, 4 August 2013

Stamping Sensations


Time for another challenge at Stamping Sensations - this month's theme is "Wings and a touch of Vintage" and there is a great prize...


I don't normally do a lot of vintage type cards but I enjoyed all the inking on this so you might see more.
and I did add lots of different elements as I don't think CAS and vintage go hand in hand...
I've used one of the Birds on a Branch dies, the Birdcage and one of the little Branches dies. The border was punched with the new Celtic Knot border punch and the flowers were made with the Carnation, Sweet William, Peony Punch and Stamp set. The bunting was made with the tiny tag die from the Beautiful Butterfly Tag and Die set.
The paper is Floral Pavilion by First Edition.

Lots of dimension and texture


Tags made into banners by cutting in half and using 3D foam squares.


Lots of glitter!

See you soon :)

Saturday, 3 August 2013

Cardmaking and Papercraft September 2013


 Good morning! I've been up cleaning the house for a couple of hours now and have a good excuse to stop and sit down with a cup of coffee. The postman has just delivered my September issue of Cardmaking and Papercraft. It was lovely to make something different for the magazine  - they asked me to make an Autumn wreath using paper flowers - so I made this using the Tonic Studios Carnation, Sweet William, Peony Punch and Stamp set. There is not actually a  paper Carnation, Sweet William or Peony on the wreath but I've used that set to make different flowers just by twisting and combing the petals in different ways. All the instructions to make the various flowers using the same set are in the mag - so why not have a go ?


Friday, 2 August 2013

Green pearlised card offer at Papermill - and flower tutorial


Today's card showcases this week's offer from Papermill Direct  - green pearlised card. I hope you can see the beautiful sheen off it in the photo. The card is 285gsm and you can buy 50 A4 sheets for £4.00. You can see the offer details HERE.
The other card from Papermill is white felt embossed, kraft and bright red.
I've used the new Tonic Studios Celtic Knot border punch along the edges of the white card and the flower are made with the Tonic Studios Clematis, Lily and Poinsettia Punch and Stamp set.
I've had quite a few emails asking about these sets...sometimes I show flowers made from them which bear no resemblance whatsoever to the named flowers on the boxes. Well, that's actually the idea behind the sets - the flowers on the boxes are only the starting point. Just twist, fold, colour and use your imagination and you never know what flower you'll have at the end :)

Anyhow, with that in mind, I've taken photos of the steps in making the flowers on this card..

This is the set I used.


1. Punch out 12 petals (the longer ones from the set ), 1 sepal and 1 stamen


2. Ink the outer edges of the petals.


 3. Fold the petals in half with the inked part to the outside..it helps to use a pokey too to fold over.


 4. The inked and folded petals should look like this.


 5. I usually put some of the glue onto a piece of card so I can dip the ends of the petals into it.


6. Slightly flatten the inner point of the petal and dip into the glue before sticking to the longer parts of the punched sepal.

 7. Glue the first 6 petals onto the sepal like the photo above, keeping the outer tips folded and pointed.


 8. Add the next 6 petals to the stamen between the first 6  - with the inner points meeting in the centre.


9. I added a punched sepal and a gem to the centre. I have added a few leaves punched from the pearlised card with the edges also inked in darker blue.