Friday, 20 May 2022

Decorating a Notebook Cover (Back and Front) with the Summer Garden Kit (Tonic Studios) #affiliate


Hi, today I’m showing you how to use the fab dies and papers from the Tonic Studios "Summer Garden" Kit (No. 56) to decorate an A5 notebook.

You can buy the kit here (affiliate links)

UK - https://shrsl.com/3j4op USA - https://shrsl.com/3j4ou


You can, of course, use the kit to make cards and you can see how I made the two beautiful cards below in my video here – 


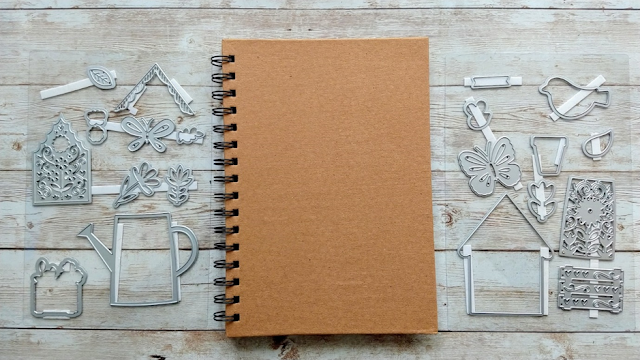
These are the contents of the kit

To decorate the front and back covers of your A5 notebook you will need the dies and papers from the kit along with Nuvo Deluxe Adhesive and some Craft Perfect Jute Twine.


Let's Get Started!

1. Cut 2 pieces of patterned paper measuring 13.5cm x 21cm.

NB. I highly recommend not gluing these to your notebook until you have completely decorated them and are happy with them!


1. Cut 2 pieces of patterned paper measuring 13.5cm x 21cm.

NB. I highly recommend not gluing these to your notebook until you have completely decorated them and are happy with them!


3. Snip off the spout and handle from the cream watering can and glue behind the patterned die cut.
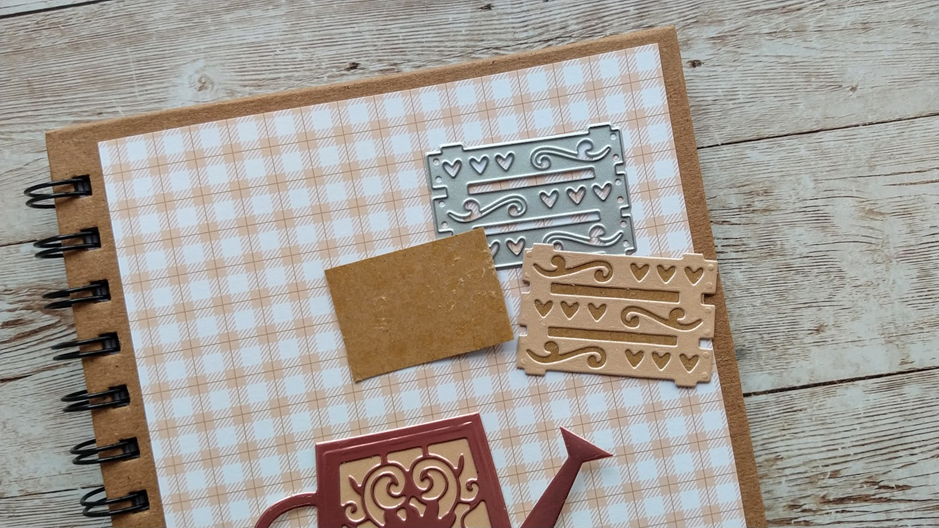

4. Die cut the planter and cut a rectangle of card to fit behind it. Glue together. 


5. Glue a small square of card to the back of the planter on the right side. This is to help keep the planter level but not add dimension.
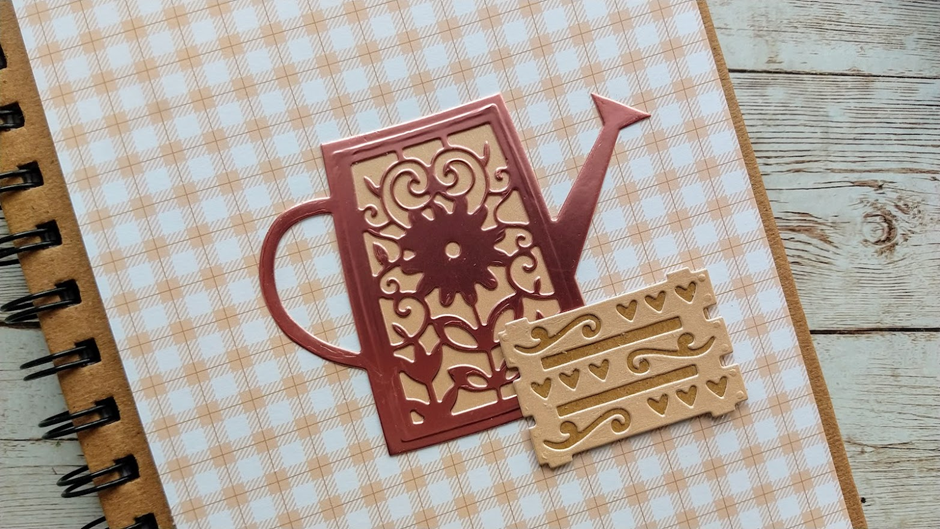


6. Glue the watering can to the paper and then add the planter as shown.


7. Die cut the bird from Coffee Cream card and 2 wings from Maroon card. Glue the wings in place and add a black dot for the eye. Glue the bird to the top of the watering can.


8. Die cut 2 Baroque Rose butterflies and glue above the bird.


9. Die cut 3 flowers with stems from Coffee Cream card and the same again from Maroon card. Snip off the Maroon flowers and glue on top of the Coffee Cream flowers.


10. Glue these to the bottom left of the watering can.


11. Die cut a selection of maroon and cream flowers and leaves. You can use the leftovers on the back of the notebook or another project.


12. Glue the flowers and leaves to the front of the notebook, around the planter and watering can. Tie a length of jute twine to the top of the spiral binding.


Back Cover -


13. Die cut the birdhouse from Coffee Cream card and the patterned panel from Baroque Rose card. Die cut the roof part from Maroon card. Glue these in place and glue to the centre of the page.


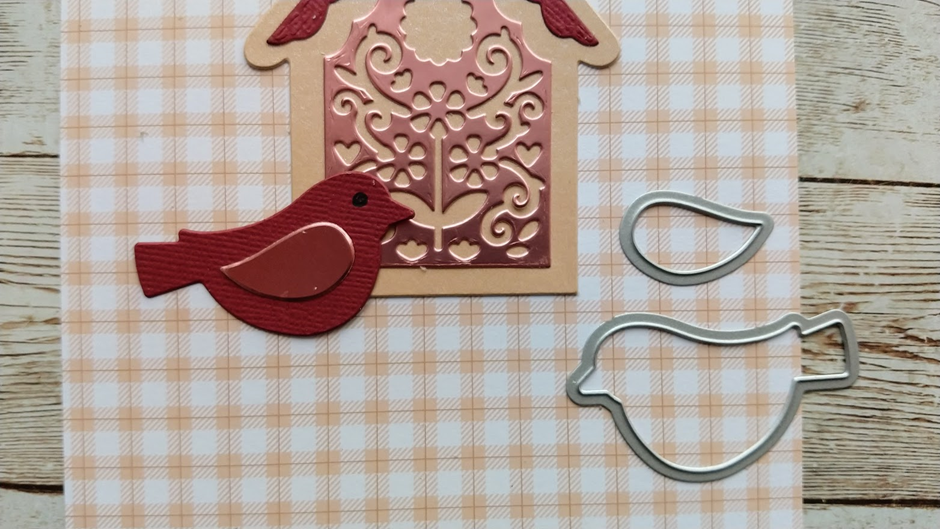
14. Die cut the bird from maroon card and the wing from Baroque card and glue onto the bottom left of the birdhouse. Add a black dot for the eye.
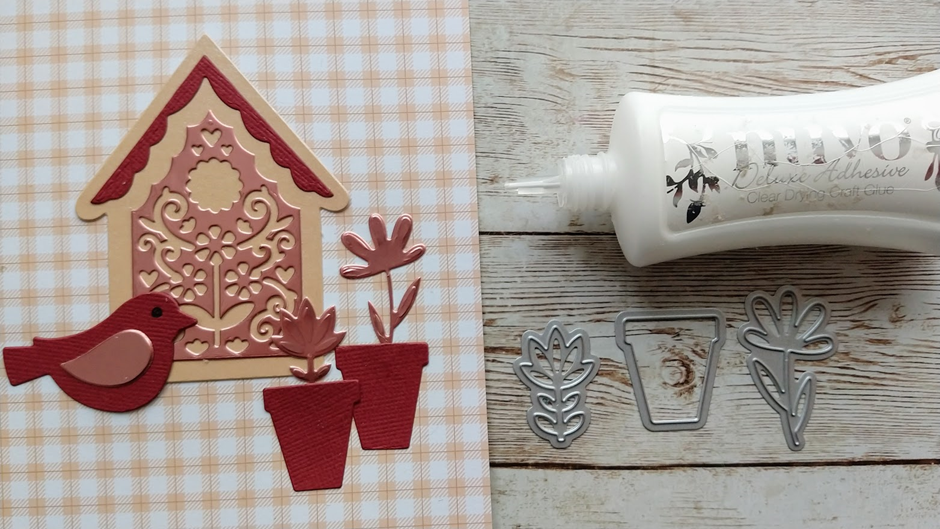


15. Die cut 2 flower pots and 2 flowers with stems. Glue to the right of the birdhouse.


16. Die cut several flowers and leaves. You can use the left overs for another project.


17. Glue the flowers and leaves around the birdhouse and add 3 leaves to each top corner of the notebook.


Tuesday, 17 May 2022

Mid Week Deals at Tonic Studios #affiliate


It's Mid Week Deal time again at Tonic Studios.
As always, these are my affiliate links if you'd like a closer look :)
On the UK site -
Friends & Love Sentimental Frames Bundle rrp £69.98 NOW £34.99!
Mystery Die Set Bundle rrp £101.40 NOW £26.99!! (save 73%)
Die Set Goodie Bag rrp £80.40 NOW £21.99!!
Dragonflies & Roses Bundle rrp £21.98 NOW £8.79!!
On the USA site -
Friends & Love Sentimental Frames Bundle rrp $73.98 NOW $36.99
Mystery Die Set Bundle rrp $114.41 NOW $28.99!! (save 75%)
Die Set Goodie Bag rrp $116.42 NOW $27.99!!
Dragonflies & Roses Bundle rrp $27.98 NOW $11.19!!


Saturday, 14 May 2022

Quick and Easy Gift Box (VIDEO TUTORIAL)

 Do you ever need a quick gift box? I have a new video on my YT channel showing how to make a very quick and easy (and cute!) little gift box. You can make the basic shape without even using any dies or stamps but can jazz it up a bit (or a lot) by adding an aperture, embellishments etc.

Have a little look over at it and let me know what you think :)


Thursday, 12 May 2022

Hot Air Balloon Shaped Gift Box!! (Tonic Studios Showcase) #affiliate

The fabulous Up, Up and Away Showcase die and Stamp set from Tonic has 40 dies in total and I’m going to show you how you can use them to make a beautiful gift box for a baby present.

These are my affiliate links where you can buy this die set


You can also see how to make a different Hot Air Balloon gift box and a gorgeous Decanter Gift box with the same die set in my video here


You will need the following Tonic products (affiliate links)

Up, Up and Away Die and Stamp Set

Craft Perfect Smooth White Card (300gsm)
UK - https://shrsl.com/38hzu
USA - https://shrsl.com/38hzz

Craft Perfect Classic Card, Cornflower Blue

Nuvo Deluxe Adhesive
UK – https://shrsl.com/36e5i
USA - https://shrsl.com/36e5j

Hi tack tape
Craft Perfect Foam Pads


Craft Perfect Arctic Blue Double Face Satin Ribbon, 9mm
Blue and White Baker’s Twine
Alphabet die set or stamp

Tangerine Die Cutting Machine
 UK - https://shrsl.com/3ctw7
USA - https://shrsl.com/3ctwc
To make it -

1. Die cut 6 of the Balloon Base shapes from white card.


2. Die cut 6 of the Balloon Lid shapes from white card.


3. Using the 2 dies shown, die cut 6 blue decorative panels and glue them to the lids.


4. Using both dies shown die cut 6 blue decorative panels and glue them to the balloon bases.


5. Gently shape the balloon base pieces with a bone folder.


6. Attach the base pieces together by the tabs with hi tack tape. NB. Attach the top and bottom tabs together first and the ones in between will easily fall into place.


7. Shape the balloon lid pieces in the same way and attach together with hi tack tape on the tabs.


8. Die cut the hexagonal roof.


9. Glue the roof to the top of the lid

10. Use magnets to connect your balloon base to the lid. Glue 2 small magnets to the inside of the balloon base with each on opposite sides of the rim. Place a second pair of magnets on the outer face of the same panels but DO NOT glue these in place. Allow them to be held in position by the attraction of the magnets on the inside. Place a glue dot on the exposed outer face of the two outer magnets.


11. Carefully position the finished balloon lid over the finished balloon base. Press the sides at the magnet area to transfer the positioned outer magnets from the base to the lid.


12. To create the basket, die cut 6 of the shapes above using the 2 dies shown. Then cut a hexagonal base.


13. Use the 2 dies shown to cut 6 blue patterned panels and glue to the bases. Glue together.


14. Glue all the sides together to form the base.


15. Glue the basket onto the base and add ribbon and a bow.


16. Die cut a blue tag and white letters and glue together. Add some twine to the tag. Poke a little hole in the top of the balloon and push the twine through.


17. Die cut a small blue hexagon and glue inside the lid to cover where the twine has been attached


18. Stamp the Special Delivery onto white card and die cut with the banner die. Die cut a blue banner and glue both banners together, then attach to the hot air balloon with a 3D foam pad.


Thursday, 5 May 2022

Make a Spring Shadow Box - Tonic Studios Designer's Choice die set #affiliate


Hello :) I've got the "Spring Shadow Box" Designer's Choice die set from Tonic Studios to share with you today.

These are my affiliate links to the set
The dies can be used to make a layered scene including lots of flowers, foliage and a little picket fence. The finished size is 8cm wide x 3cm deep x 8cm tall at the highest point.

You can see how to make it in my video here


I show you each step of how to make the first shadow box using only this die set and different colours of card. In my second example I have incorporated several dies and a stamp from the "Campfire Critters" Stamp Club. I thought it would be a good idea to remind you and myself to broaden the scope of the set and to think about doing this with other sets which we might have.

In this video I have used (affiliate links)
Spring Shadow Box Designer's Choice die set

Campfire Critters Stamp Club

Nuvo Deluxe adhesive
White Smooth Card

White Smooth Card

Nuvo Alcohol markers

Crystal Drops

Thanks so much for looking :) If you enjoy the video please don't forget to "like" it and subscribe to my channel :)

Happy crafting!
Disclaimer: some of the links on some of my videos are "affiliate links", meaning that if you purchase using those links, I receive a small commission but this will not cost you any extra.
Please consider using these links when you visit these sites. I earn a small commission at no added cost to you:
Tonic Studios UK - https://shrsl.com/35m6e
Tonic Studios USA - https://shrsl.com/35m6k
Scrapbook.com - https://shrsl.com/34x4s

Wednesday, 4 May 2022

Creative Stamping Magazine issue 108 #affiliate

 My copy of Creative Stamping issue 108 has just been delivered and I was delighted to see one of my cards on the cover :)

This issue celebrates the 70th anniversary of the coronation of the Queen and there is a huge 37 piece stamp set and a 3 in 1 stencil on that theme.
You can see my video here

I've just had a quick look through the mag and have shared my thoughts on it with you, hopefully whetting your appetite without giving too much away if you haven't already got a copy!

If you would like to buy the magazine, this is my affiliate link


Thanks so much for looking :) If you enjoy the video please don't forget to "like" it and subscribe to my channel :)